Host the perfect meal in no time with these 7 simple homemade outdoor grill ideas
What is the definition of grilling? What are the health benefits of grilling? What are some grill ideas that you can use at home and are also easy? We have got it all covered for you!
We’ve all been watching our mom or dad do grilling for as long as we remember. Remember the aroma of beef from those juicy burgers and all that fat pouring onto the red glowing coals that sparkle with a roar and a blast of flame and blue smoke swirling around the hot edges?
It’s fun to see the excitement in the faces of your grandkids and kids watching you expertly flip burgers in style and grace. It’s possible to say that grilling is an instinct we all have, and it’s part of our DNA nearly from the time we are born.
What is Grilling?
The scientific definition of grilling describes it as a dry, fast cooking method that uses a “significant amount of direct, radiant heat.”Frying on the pan or griddle utilizes direct conduction heating, while grilling uses thermal radiation.
Grilling temperatures can often exceed 260 degC/500 degF making this a fast cooking method that you must observe. Otherwise, your perfectly cooked hot dogs will burst into road flares in mere minutes.
Grilled foods taste better by browning proteins and sugars, creating that beautiful coloration and extra flavor profile on meat and vegetables. It’s called the Maillard reaction, and this browning happens when foods reach temperatures in excess of 155 degC/310 degF.
When it comes to real grilling, you cook food using an open wire grid, with the flame either in the middle or above the food.
5 Health Benefits of Grilling
There are many health benefits of cooking food by grilling it instead on the stove or in the oven. Below are 5 health advantages of grilling.
You Eat Less Fat
By grilling your food, you consume less fat since the excess liquid drips off of the grills. Imagine cooking a hamburger on the grill instead of in the pan on the stove. When you grill it, the fat melts away. In a pan on the stove, the fat has no place to go, which is why it collects and then gets absorbed into the food.
Vegetables on the Grill are Better for You
Many people are unaware that vegetables store most of their minerals and vitamins when grilling, which is especially true of vegetables with low water content. There are many health benefits of cooking food by grilling it instead of on the stove or in the oven. Below are 5 health advantages of grilling.
Plus, vegetables that you toss on the grill are usually fresh and in season, which is a step above the canned versions. In wrapping your vegetables in foil or even placing them on top of the grill, cooking your vegetables is healthier than boiling or cooking. Once they are cooked, you can then add seasoning to taste, as well as any sauces you wish; if you are a fan of buffalo sauce, for example, you may wish to check out this review on TheNutritionInsider.com to see if the offering from Primal Kitchen could become a future purchase next time you need sauce.
Meat Retains Nutrients
If you throw a piece of meat in the flame, it will preserve more thiamine and riboflavin. These two nutrients are essential to a balanced diet and provide numerous health benefits.
You Use Less Butter
If you’re skilled at the grill and don’t overcook foods, you’ll get delicious cuts of meat and tasty vegetables. You’ll not be tempted to go for Butter or any other sauce to spice up your meals since the grill traps in more moisture. This means that not only do you consume fewer calories, and you’ll put fewer harmful things inside your body.
Grilling Goes With Outside Activities
Grilling takes you outside. Parents often toss around the Frisbee or throw an object around while playing on the lawn with their children as they cook dinner. Cooking and eating out encourages more physical activity, which, as we all know, is an added benefit to accompany your tasty meal.
7 Simple Homemade Outdoor Grill Ideas
DIY Oil Drum Grill
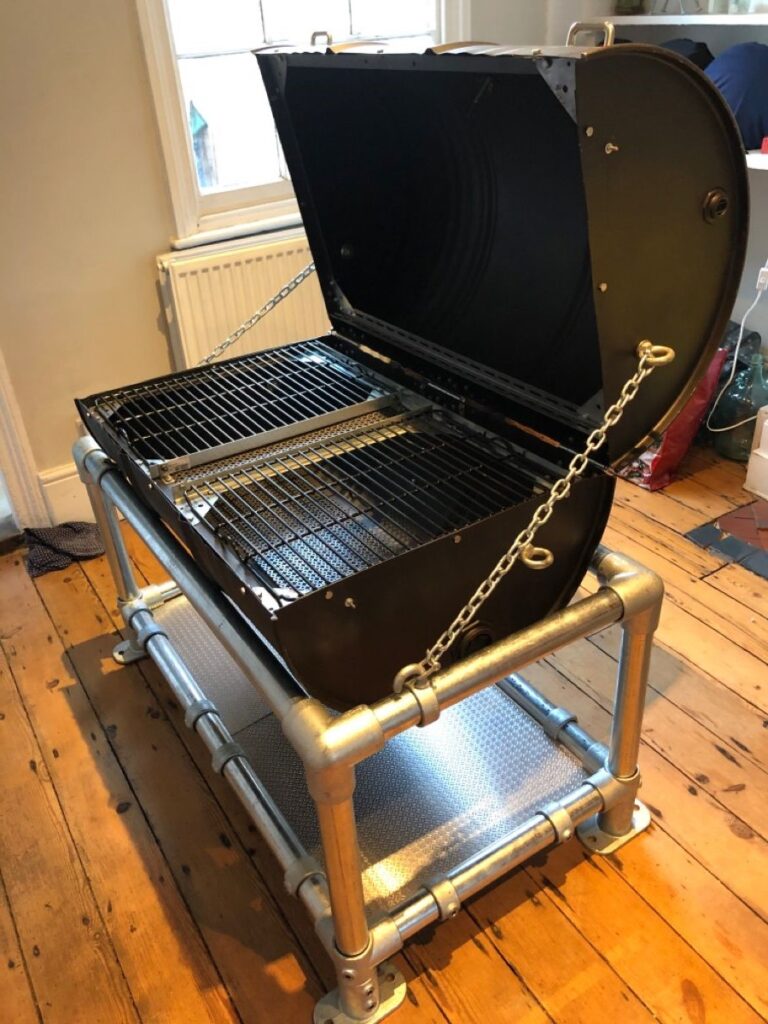
First on the list we have DIY oil drum grill. You can get your hands on old oil drums quite easily. The key to using oil drums for this is to strip them back to their metal base.
Certain oil drums can be painted. Of course, you wouldn’t intend to cook anything in a painted oil drum if it melts or peels off and gets in your food.
Here’s a checklist of what you’ll require to prepare this grill:
- Oil Drum
- Paint Stripper
- Scraper
- Grinder
- Grill Rack To Fit Oil Drum
- Drill
- Screws To Hold Grill Rack In Place
You’ll first have to apply the paint stripper to the painted oil drum and use your scraper to remove all the paint. You’ll then need to scrub the entire thing to ensure it’s safe to cook in.
The process of washing or soaping the drum with the solution of water and vinegar is an excellent method to get rid of the bacteria.
You’ll then need to use your grinder; to cut three sections from the oil drum, creating an area that will keep your grill cool and well ventilated.
The bottom part should be smaller as you do not want all smoke to escape from the area where the fire is going to be lit. This gap intends to assist you in lighting the grill using an extended grill lighter.
The second one has to be slightly larger because this is the area the place where you’ll put your food items on the grill rack after having put it up. The top portion must be the identical size to the second one so that you can give the smoke a place to go.
You’ll need to first drill holes into the oil drum below the middle opening you’ve made, creating the space for the screws that will hold the grill rack.
The number of screws you’ll need and their dimensions will depend on the dimensions of the oil drum that you have; however, you’ll be able to gauge the size based on the grill rack you’re using.
Screw the screws in and set the grilling rack in front to ensure it sits comfortably, yet it is possible to remove it to allow for clean-up afterwards. Lighting charcoal and a different fuel source inside the bottom of your oil drum can provide heat and help cook your food directly on the griddle rack you installed!
DIY Clay Pot Grill

This is the most simple grilling method that is available. You’ll require two items:
- Terracotta Clay Pot
- Griddle Rack
It’s that simple. The bigger the clay pan, the better, since it will be able to cook for many more people at the same time. All you have to do is find the griddle rack that will fit into the pot, and you will be good to go.
Since most terracotta clay pots are wider on the top and narrower in the middle, there’s an effective method to hold your griddle rack by pushing it downwards gently until you can wedge it into the desired position.
In the bottom of your pot, ignite charcoal, and allow the griddle rack to warm up until it’s nice and hot; then, put your food items on the rack to cook. It’s as easy as that!
Brickwork Grill
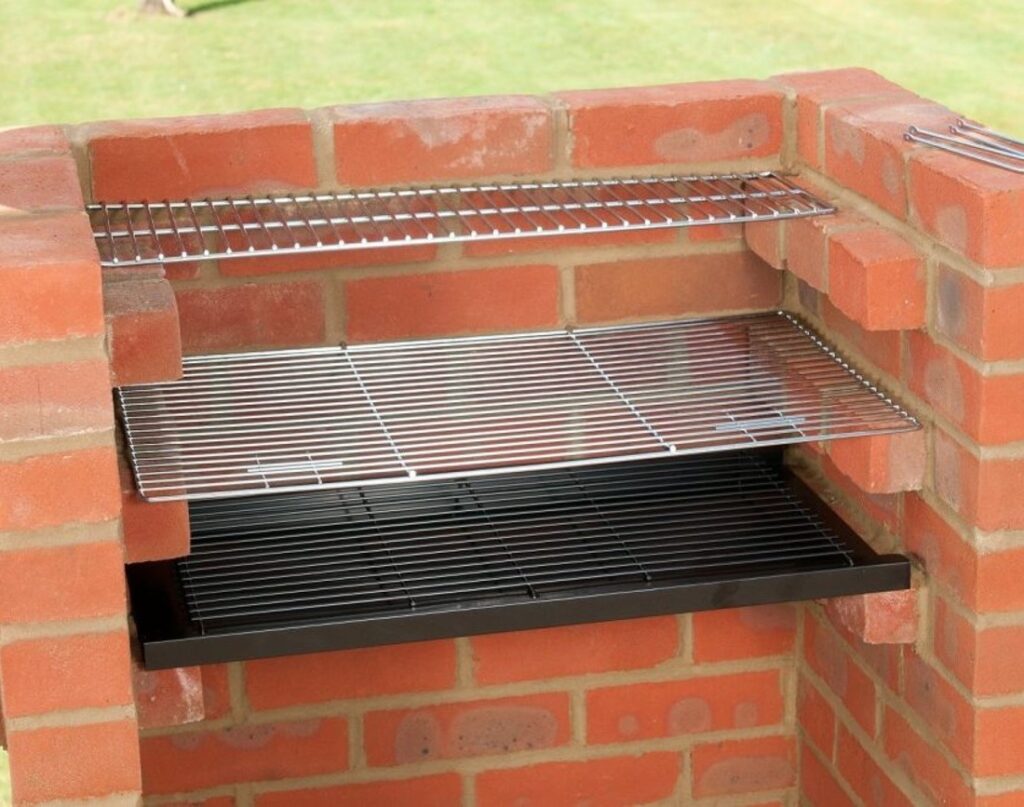
The choices above are a little temporary, so if you seek a permanent homemade grill, this one is for you! The brickwork grill.
It’s possible to build it yourself or hire a professional bricklayer to build the foundations to your specifications; however, it is all about your confidence level. If you decide to do the job yourself, here’s the basic outline of what you’ll require:
- Bricks
- Mortar
- Brick Trowel
- Spirit Level
- Jointing Bar (If You Want The Finished Product To Look Professional)
- Line And Pins (To Keep Bricks Straight)
- Tape Measure
- Soft-Bristle Brush
- Grill Rack
- Charcoal Pan
Method of Mounting Pan and Rack to The Brick Wall
Instead of focusing on the step-by-step procedure of the bricklaying process, we will provide an overview of the design and function that your grill will serve. You’ll have to seek out the details about bricklaying on your own or employ a professional!
You’ll want to build an outdoor brick grill that is at least as large as the grill racks you buy, and, therefore, they could be anything from small to huge according to the grilling requirements.
It is necessary to construct your structure of bricks upon a concrete base. The base of your grill should be about 3 or the size of 4 bricks.
It should be enough if you want to aim for 36” in height and 44” in width. However, the size of your grill rack will determine the size you select. The bottom of your grill will collect any food particles that are later scrubbed and cleaned.
You need an additional charcoal pan, and you’ll use it to warm the above griddle rack. You’ll have to fix your grill rack as well as your charcoal pan on the walls of the grill’s brick structure, too.
Make an outer structure of bricks which is taller than the grill to shield it from winds to ensure a better grilling experience!
After that, it’s a matter of lighting the charcoal in the charcoal pan and then placing your food items on your grill rack. Clean-up is simple due to the ample space under the grill, and it’s a structure you can use for a long time!
DIY Fire Pit Grill
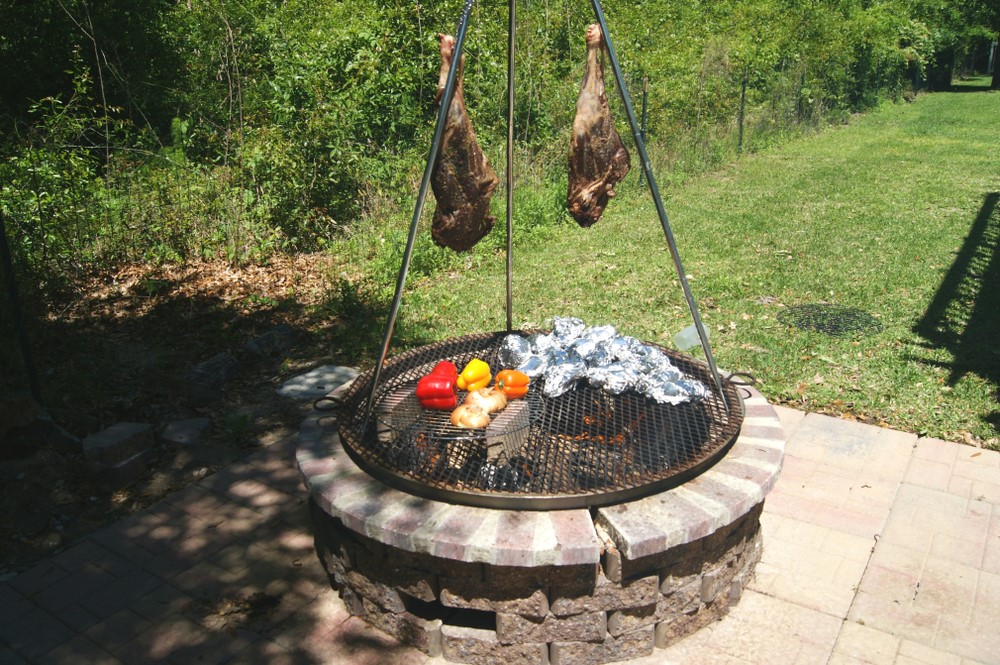
Fire pit grill is a relatively simple yet permanent option. You can create a fire pit grill in many ways, but the best way involves building a well-like structure in the ground out of bricks and then simply placing a griddle rack on top of that. Here’s what you’ll need:
- Bricks
- Mortar
- Brick Laying Tools (As Outlined In the Previous Section)
- Shovel For Digging Out The Ground
- Grill Rack
To achieve this, you’ll need to dig out an area of your garden to create a lower space where you can light your fires. You can then lay bricks (or have a professional do it) to make the well, which you will then top with your grill rack.
It’s a very simple but effective way of turning a fire pit into a grill, but as with everything we have listed in the article, there are many ways of doing it. If you think of a different or better way, then why not try it?
Built-in Barbecue Pit
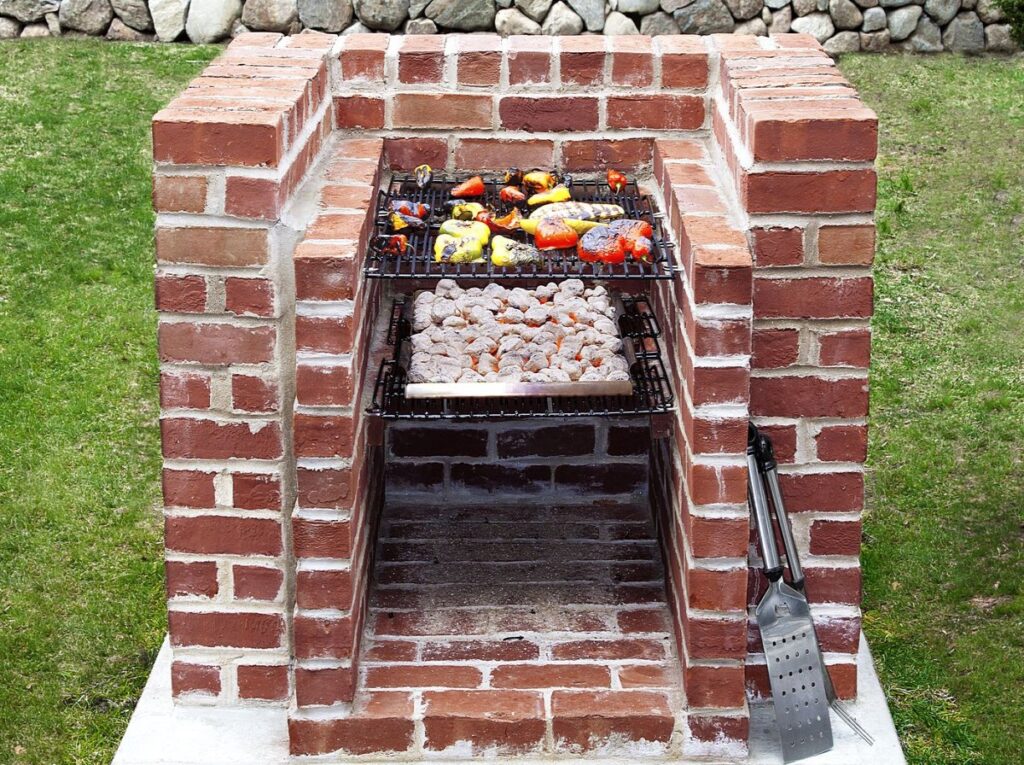
Build this simple barbecue pit; it’s a relatively easy job and likely to cost less than a fancy new gas grill. With the right tools, materials, and a little skill, you can put together a basic brick barbecue at the weekend.
Make this pit for your barbecue. It’s a fairly simple task and will likely be less expensive than buying a new grill. With the right equipment, materials and a bit of skill, you can build the basic brick barbecue in an afternoon.
Mini Charcoal Grill Centerpiece
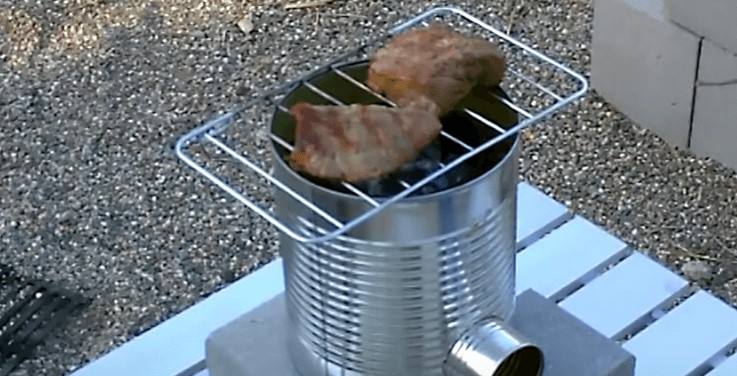
Mini Charcoal Grill Centerpiece | Simple Homemade Outdoor Grill Ideas
Make your own Mini charcoal grill to use as an elegant table centerpiece. Enjoy your urban summer grilling celebration.
Hanging Barbecue Grill
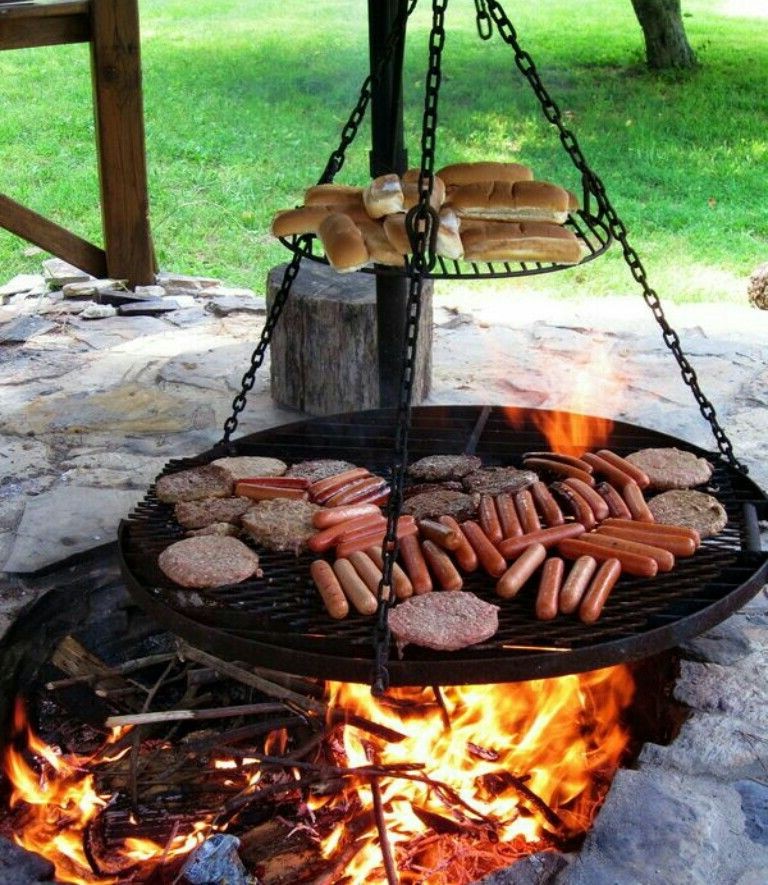
Last but not the least, hanging BBQ grill. Find a brand new charcoal grill that you can put within your yard. You’ll require an automobile wheel as well as some other things to complete this task.
A homemade grill is a wonderful thing, and it’ll be something you’ll be proud of for years to come – no matter how you decide to build it!
Also Read: How to Build a Fire Pit with Bricks


