A fire pit is a great way to add warmth and color to your backyard or patio area. Most of you might want to build a fire pit on your own. Many fire pit options are available for homeowners, including brick, metal, block, and masonry blocks. You can use preformed fire pit bowls or standard brick to build a strong fire pit. This tutorial will focus on how to build a fire pit with bricks for your backyard turf or patio. While reading, consider what steps you could tweak to match your aesthetic and skill set.
One benefit of building a DIY fire pit is that you can alternate materials depending on your design preferences and outdoor decor needs. For example, use cement blocks in place of bricks if you’d like a variety of shapes and sizes to make up your pit’s structure.
Materials and tools you’ll need to build a brick fire pit:
· Work gloves
· All-purpose gravel
· Bricks or paver blocks
· Brick trowel
· Rubber mallet
· Bubble level
· Manual tamper
· Construction adhesive/mortar
· Lava rock
· Seasoned firewood
How to Build a Fire Pit with Bricks?
Step 1: Check Local Guidelines
Before implementing any technique for ‘how to build a fire pit with bricks?’, research local fire codes to ensure you won’t break any laws. Most areas allow fire pits for recreational purposes, but there are a few guidelines to consider. Here is an example of a standard burn ordinance from the City of Winston-Salem Fire Department:
“No person shall kindle or maintain any bonfire or rubbish fire or authorize any such fire to be kindled or maintained on any private property, on or in any public ground, without a permit or other proper authorization. Allowable burning includes fires used solely for outdoor cooking and other recreational purposes.”
The ordinance then defines “allowable” fires as those:
· Confined to a container (such as a fire pit).
· At least 25 feet away from structures.
· Lit only with dry wood or other kindling material; accelerant, garbage, and garden clippings aren’t acceptable for fire starters.
· Maintained with seasoned wood.
· No more than 3 feet tall and 2 feet wide.
Next, check your homeowner’s insurance policy to ensure a fire pit won’t affect your coverage. In the least, your policy may require you to disclose your plan to build a fire pit on your property, so notify your agent ahead of time.
Once you’ve determined that installing a fire pit is safe and lawful in your area, you’re ready to implement the process.
Step 2: Select the Shape and Location of Your Fire Pit
The location of the fire pit should be chosen away from any flammable structures, such as garages, sheds, and houses. You should ensure that there aren’t any trees too close to the fire pit and no branches or utility wires below it.
The next step in building a brick fire pit is to choose its shape.

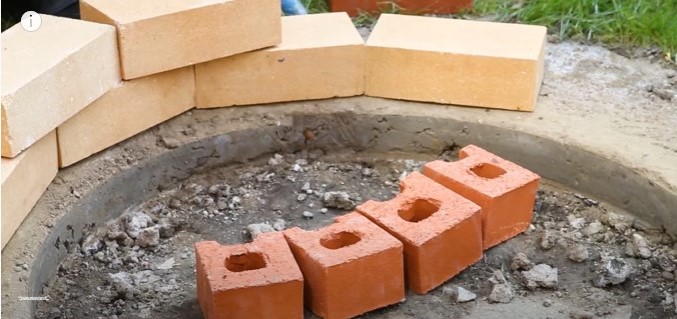
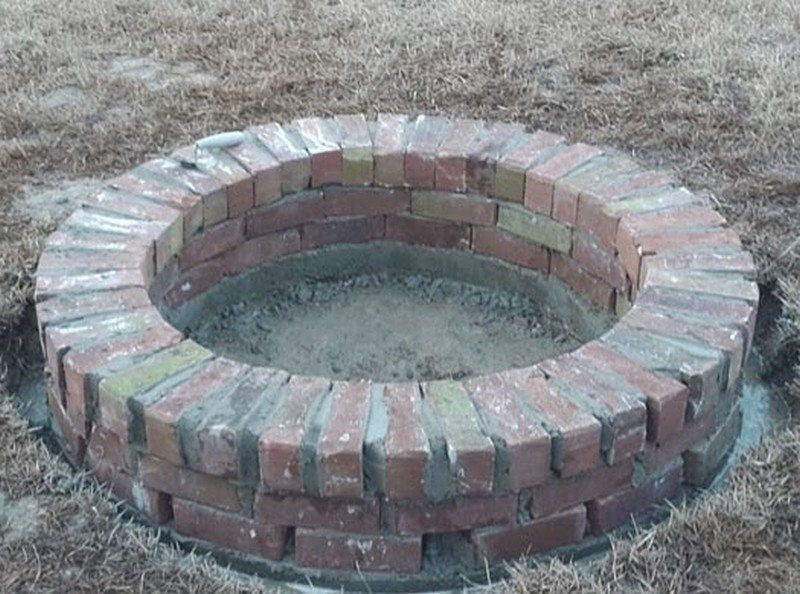
You’ll need trapezoidal blocks to construct a circular fire pit. Trapezoidal blocks fit together to create a circular shape without leaving any gaps.
Build a rectangular or square fire pit for more design options and ease of building. No matter your fire pit shape, it should be about 3 to 4 feet in diameter.
Step 3: Create the Fire Pit’s Base
Your fire pit’s location will determine its base.
Before building a fire pit on grassy land, you will need to lay gravel, and your fire pit will be on a solid foundation.
These steps will help you build your fire pit base in the grass.
- Mark the fire pit’s outline with a pencil. Then, remove any grass or sod from the area using a trowel.
- Remove dirt and turf until the fire pit is about 5 to 7 inches deep.
- Use a bubble level to check for uneven ground and manually tamp the area.
- All-purpose gravel can be used to fill the hole.
- Soak the gravel thoroughly with a watering can to create a strong, compact foundation.
- Check the bubble level again and add gravel if necessary.
Building the fire pit on an existing patio or concrete slab means there is no need to lay a gravel foundation. You can start laying your first row of bricks immediately because the ground is already level and free from flammable material.
Step 4: Stack the Bricks
After establishing the fire pit’s base, it’s time to start stacking bricks.
The bricks will not be glued together yet. Instead, you will be stacking the first two brick layers to ensure your fire pit is large enough for a fire pit bowl.
Place the first layer of bricks around your earlier outline. Place the bricks around your border and ensure they are snugly against each other.

To ensure that everything is level:
- Make sure you use a level as you work your way around the perimeter.
- If necessary, add leveling sand to uneven bricks.
- After laying the first layer, check it again with the level.
The second layer of bricks will be applied next. You don’t need to attach any blocks together, but you will temporarily lay out the shape for your fire pit.
Laying the second layer of bricks, alternate the order in which the brick joints are placed — the place where the two bricks meet. Place the middle of the brick at the joint between the layers below to create a stronger fire pit wall.
Check the temporary second layer with the level and make adjustments as needed.
Step 5: Install the Fire Pit Bowl
For added safety and style, a fire pit bowl is a structure you place in the middle of your pit. Fire pit bowls are usually made from steel and have a high heat finish that will last many years.

A fire pit ring looks similar to a bowl but doesn’t need a base. Ring inserts can be used with backyard fire pits that have a gravel base. After building walls, you will need to add gravel to the pit’s bottom, which will help drain out moisture and provide a foundation for kindling materials.
Whatever option you choose, make sure that the bowl or ring is appropriate for your fire pit. The correct sizing will simplify the fitting process and prevent you from having to resize brick borders.
Place the bowl in the middle of your fire pit to test it. Make sure the brick border is visible at the bottom. After fitting the bowl, remove it from the fire pit and place it in a container. You can now move on to the next step in your DIY project.
Step Six: Apply adhesive to the bricks
Apply adhesive between brick layers to complete your brick fire pit construction.
Begin by removing any bricks that were temporarily placed as the second layer in your pit. To keep your pit’s shape constant, we recommend that you remove and replace them in smaller sections.

Place your fire pit on a gravel foundation to ensure that the bricks underneath are stable and don’t move around. Attach the first layer of bricks to prevent the fire pit from moving if it is placed on a brick or concrete patio.
After establishing the first row of bricks, it’s time to start building the rest of your fire pit.
Install adhesive on the first layer of blocks. Then, attach the second layer. To smoothen the mortar, use your brick trowel and rubber mallet to push bricks into their place.
You can avoid uneven fire pit walls by checking each layer with a bubble level. Repeat the fire bowl test with each row to determine if any blocks require adjustment.
Continue this process until you have at least three to four layers. Place your fire pit bowl/ring in the middle, and you will have your brick fire pit ready. Thus, how to build a fire pit with bricks has such an easy solution.
How to Use Your Fire Pit?

You have now built a brick fire pit. Now you must learn how to use it.
Line your pit or bowl with 3-4 inches of lava rock before you start any fires.
Because of its high-temperature tolerance and durability, lava rock is a volcanic material that works well in fire pits. The lava rock can be used to line your pit and prevent moisture from collecting in the pit.
You should carefully read the labels of any materials you put in your fire pit – certain varieties of river rock or glass can explode when heated up.
Place a stack of dried, seasoned wood on top of the lava rock. Seasoned wood is one that has been allowed to dry, so it’s ready for burning. Unseasoned wood is saturated with moisture, which slows down the lighting process and produces lots of smoke.
Dry wood can be lit quickly and burned for longer periods without catching fire.
Use a long-stemmed lighter to light your wood-burning fire pit and add kindling material.
Benefits of a Brick Fire Pit
People look for ‘how to build a fire pit with bricks because of its several benefits. Brick is a great material for your fire pit because of its durability and fire-proof properties.
Clay brick is formed when clay particles are exposed to high temperatures. These clay particles combine to create a stronger substance than concrete and cement pavers.
Brick is virtually maintenance-free, and brick is resistant to decay so that fire pits will last many years without any care.
Brick fire pits are not only strong and long-lasting, but they also have other benefits.
A fire pit is a great way to add warmth and character to your backyard patio. Add seating around the fire pit to give your guests access to an outdoor oasis.
A brick fire pit can double as an outdoor kitchen. You can toast hotdogs at a family barbecue or warm up with homemade s’mores.
Also Read: How to Build a DIY Smokeless Fire Pit?


