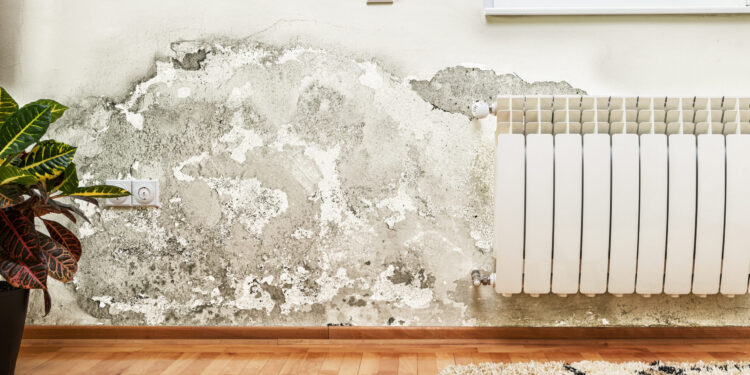
Water damage is always considered an emergency. Regardless of the amount of water flooding your house, it is absorbed by porous building materials in the floor and walls. Water damage causes extensive structural damage and mold growth if not checked immediately. Therefore, water damage worsens with time. Excess water should be extracted and affected areas dried immediately. Read on to learn how you can dry water-damaged walls.
Factors that Affect Wall Drying Time
While you can leave the drywall to dry on its own, you’ll probably wonder how long you should wait before the walls dry completely. Ideally, drywalls take up to three days to dry completely. However, the actual time varies depending on the following factors:
- The extent of water damage – an extensively water-damaged wall will certainly take longer to dry. A completely soaked drywall will take more days to dry than a partially soaked one.
- Drying method used – soaked drywalls dry quickly if several drying methods are employed. If you rely on air drying alone, your drywall will take longer to dry out completely. However, using other drying techniques and equipment, such as high-volume fans and dehumidifiers, significantly reduces the drying time.
- Wall covering – walls with few paint coats won’t seal the absorbed moisture, making it easier for the drywall to dry. On the other hand, walls with wallpapers or multiple paint layers take longer to dry.
- The openness of the wall – water damage affects both the front and back of drywalls. If such occurs, both sides should be open and easily accessible for drying. Otherwise, the open side will dry faster than the other side. This most likely results in mold growth on the covered side.
Tips for Drying Water-Damaged Walls
You should act fast to prevent extensive water damage and additional harm. To handle things well and get the job done quickly, you can also hire a Rochester Water Damage Restoration Contractor.
Meanwhile, you can follow these steps to dry water-damaged walls:
- Identify the source of water
The first and most important step in drying water-damaged walls is identifying the source of water damage. You should stop the source of water before you start drying soaked walls. You can fix or hire a professional to fix the leak. If water damage is from extensive leakages, such as burst pipes, you should turn off the water supply from the main line. If flooding or other natural disaster is the water source, you should wait until the disaster subsides.
- Remove everything from the room
As mentioned, walls dry faster if they are in an open area. Therefore, remove all the moldings, baseboards, and trim to speed up the evaporation of absorbed water. Ensure that the baseboards, molding, and insulation dry completely before fixing them. If your padding and carpet are affected, remove and dry them separately.
- Extract any remaining water
You should soak up any remaining water to avoid mold development and unpleasant odor. If the amount of water remaining is low, you can use a bucket and towel. If you find this time-consuming, especially if there’s a lot of water remaining, you can buy or rent a water pump. A submersible pump is handy in eliminating any remaining water from the area.
Once you’ve dried the floor, walls, and ceilings, you can use a vacuum machine to start drying. Vacuum various parts of these surfaces to ensure no remaining water.
- Inspect the extent of water damage
With everything clear, you can evaluate the extent of water damage on your walls. If the water damage is extensive, chances are the drywall is crumbling, sagging, and beyond repair. The same should be done to the ceiling, cabinets, wall studs, and flooring. All items that can’t be dried should be replaced.
- Dry the wall
Proper ventilation is important before you begin drying your water-damaged drywall. Start by opening your exterior doors and windows and switch on the air conditioner. To effectively dry out the drywall, you should consider using a strong fan. High-volume fans and dehumidifier are effective.
If your drywall is covered with enamel paint or vinyl coating, drill holes at intervals to increase airflow and hasten drying. Ensure that your room remains ventilated as you dry out the soaked wall. Employing damp wall treatment services are also a good idea.
- Sanitize the wall
While acting immediately is important, you should take proactive measures to prevent unpleasant smells and the possibility of mold growth. This requires that you use a chemical sanitizer to clean the affected area. Chemical sanitizers prevent musty odors and kill mold spores. If the smell has already formed, use an ozone generator to clean the indoor air.
However, you should adhere to the instruction manual when using an ozone generator. Most manufacturers recommend that you vacate the area for several hours when the machine is in use. Keep this in mind when planning the drying process.
- Repair and repaint the wall
The last step is replacing everything removed from the wall. Reattach the cabinets, wall studs, and other items you had initially removed for the wall to dry. If there’s minimal damage to the drywall, you can repair it yourself. You should then repaint or install wallpaper to give it a fresh look.


