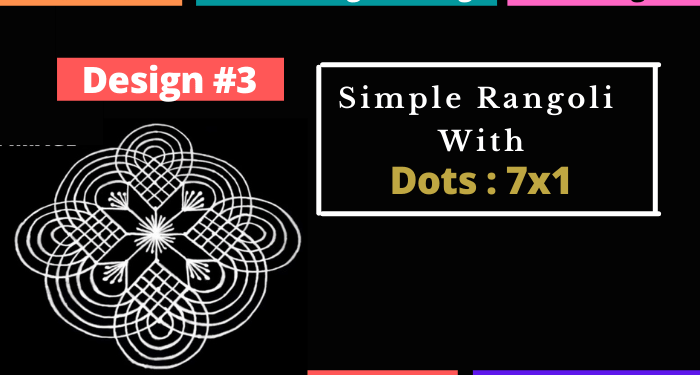
Rangoli Design Name: Simple & easy rangoli designs with dots (7-1 dots) – Design #3.

Decide the surface to draw rangoli: Front door entrance, sidewalks of the main door entrance, corners of the house
Materials required: To make the outline of the rangoli, you can use rice flour, chalk powder, or white rangoli powder. Using white colour for outlining the rangoli is considered sacred because white signifies purity, innocence, peace, and simplicity. You can make your rangoli design freehand by taking the rangoli material between your thumb and forefingers and letting it flow freehand. If you are not comfortable freehand, use a mehndi cone or a tube. You can use various rangoli colours, flowers, petals, various colour rangoli powder, diyas, grains, pulses, cereals, candles, pot-lanterns to decorate the rangoli depending upon the occasion or your choice.
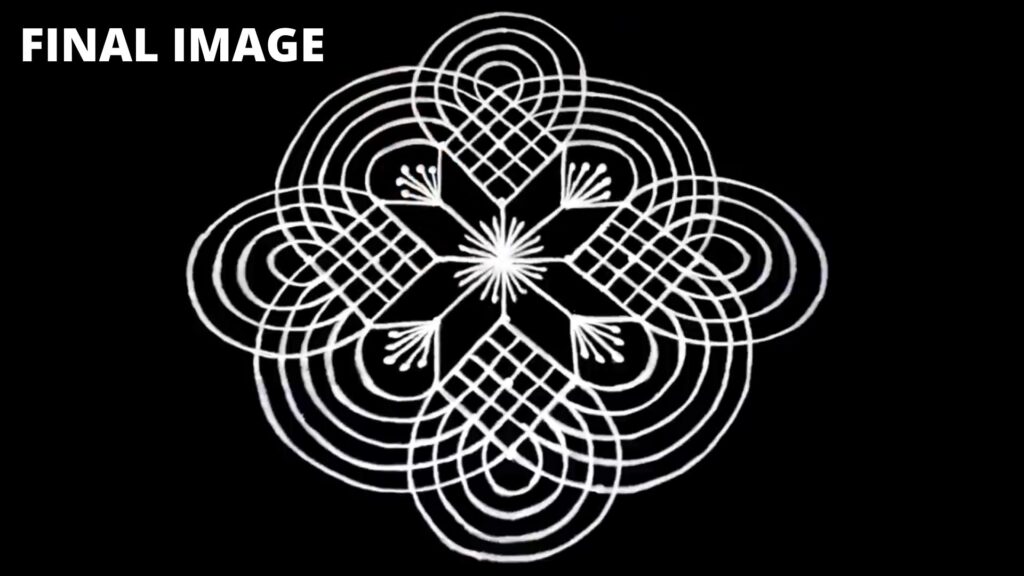
Above is the final image of the simple rangoli design based on a 7×1 rangoli dot pattern, which we will create today.
Step 1 to 7: Creating 7×1 Rangoli Grid
Before we start drawing our rangoli design using dots, we will make a 7×1 rangoli dot grid as shown in Steps 1 to 7 in the images below.

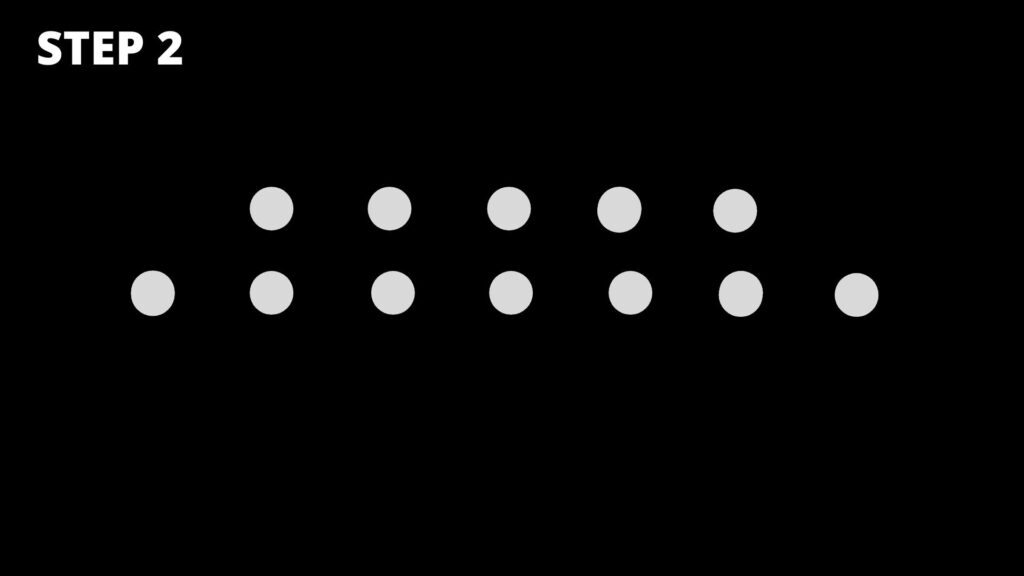





How easy was that? You can see in Step 7 that our 7×1 dot grid is ready, and we are ready to go. Let’s move on to the next steps.
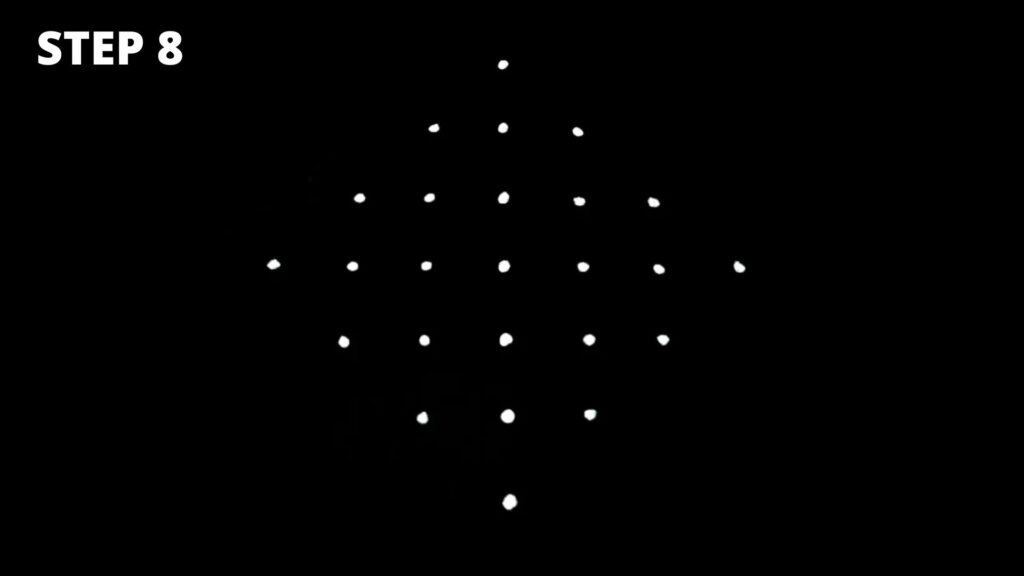
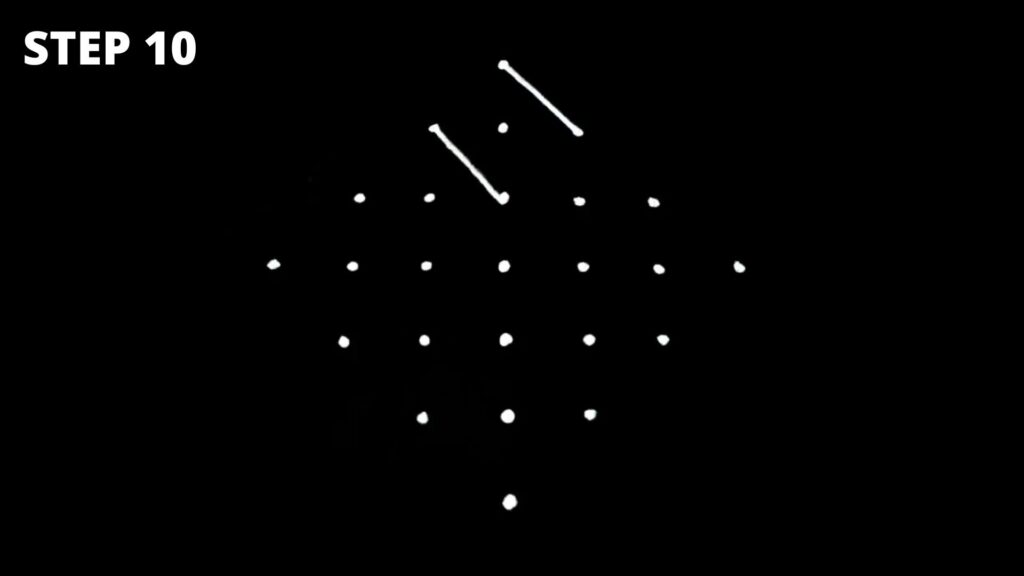
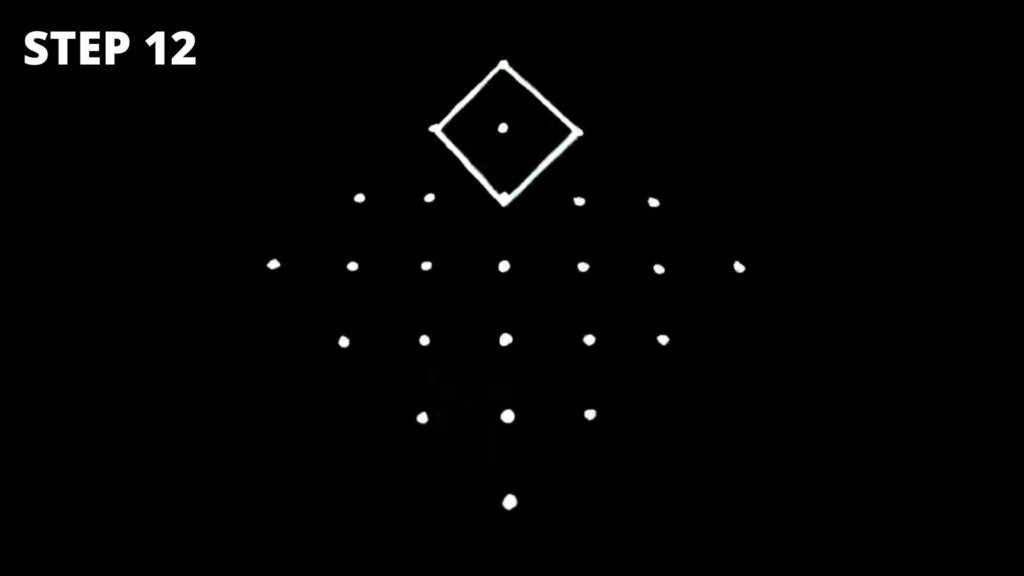
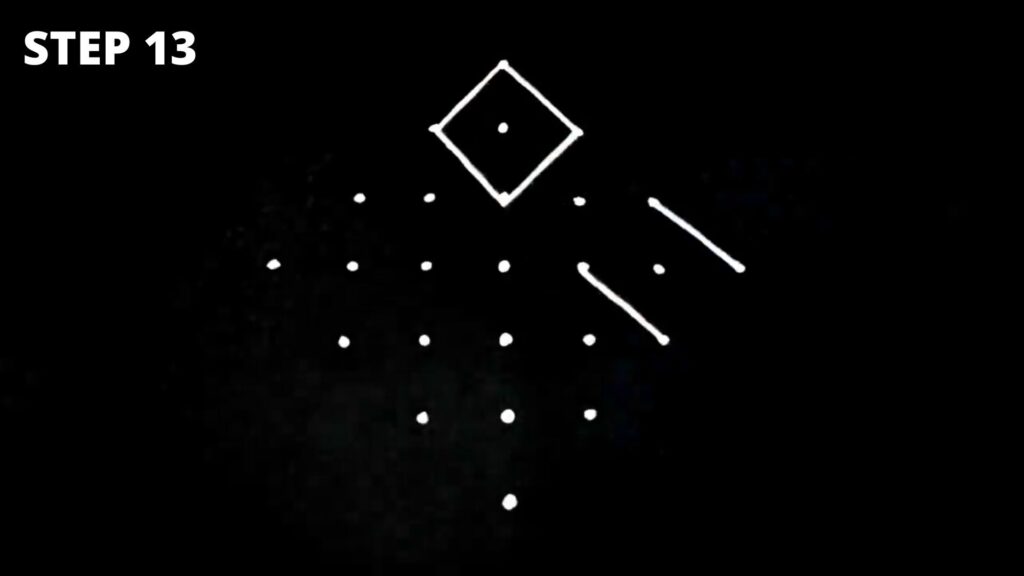
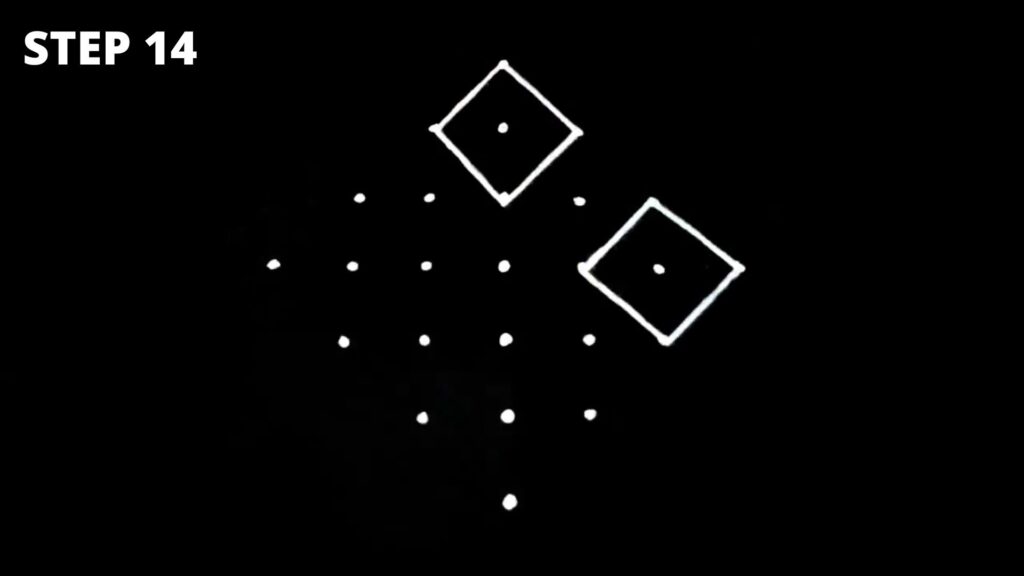
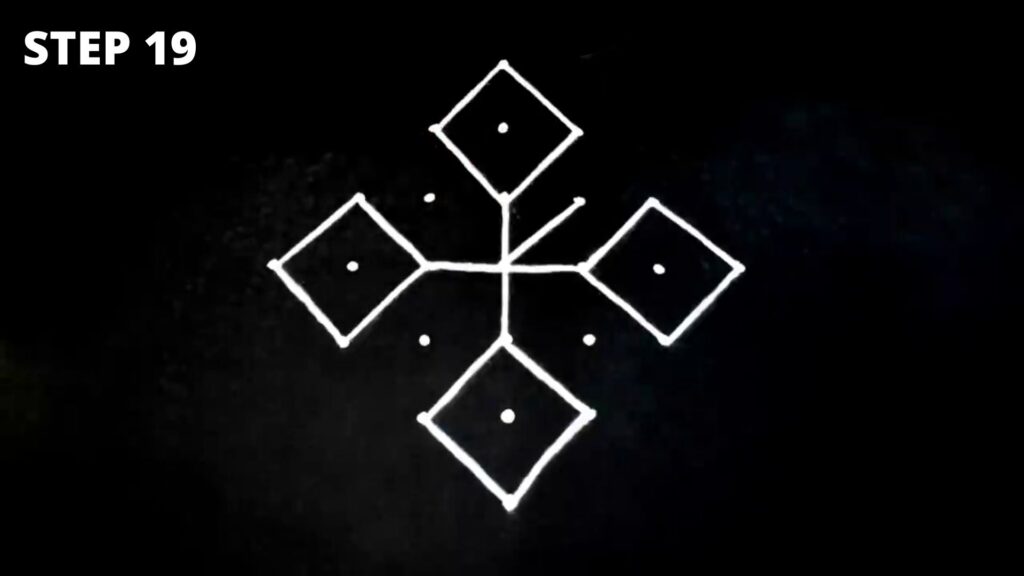
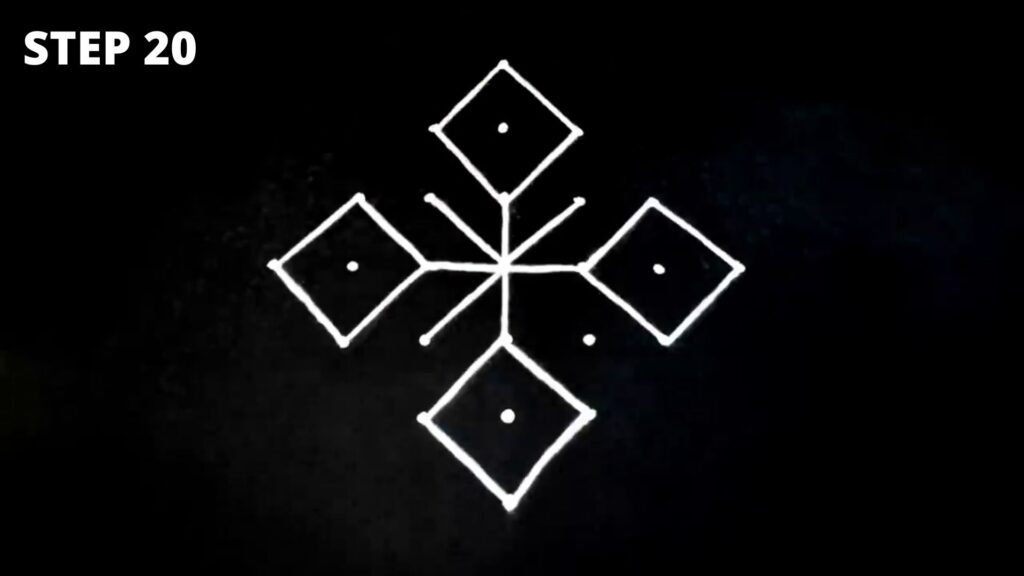
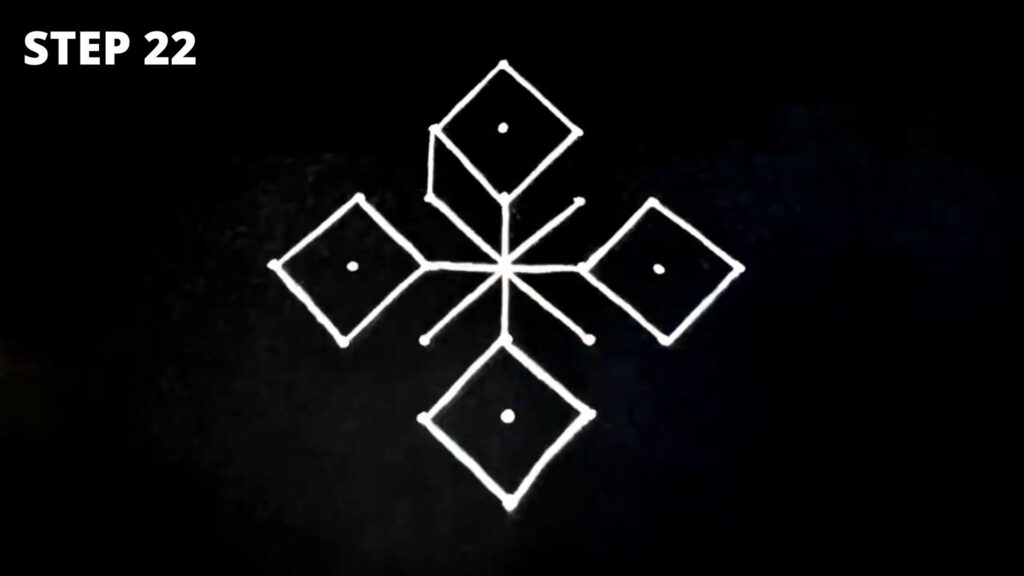
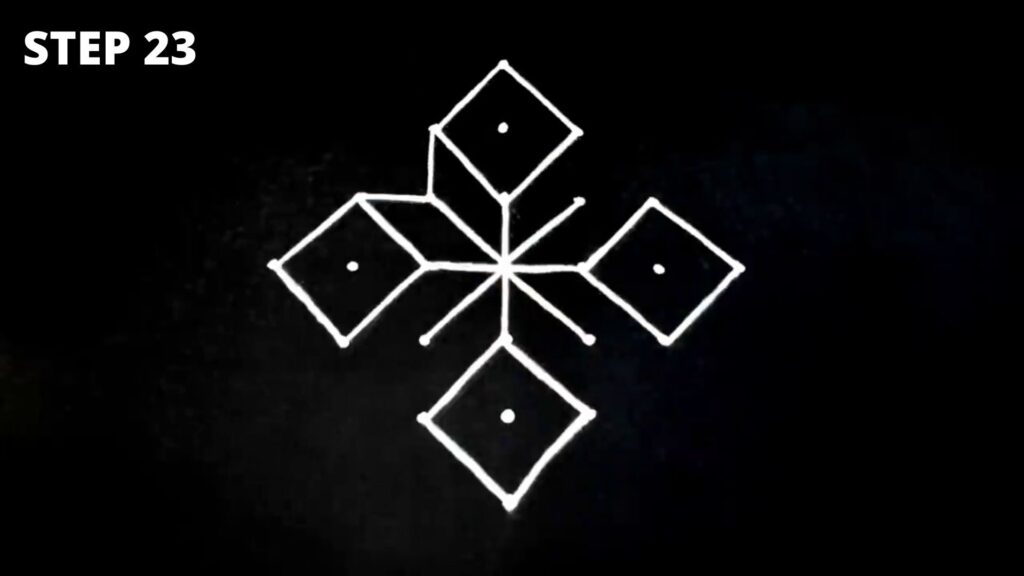
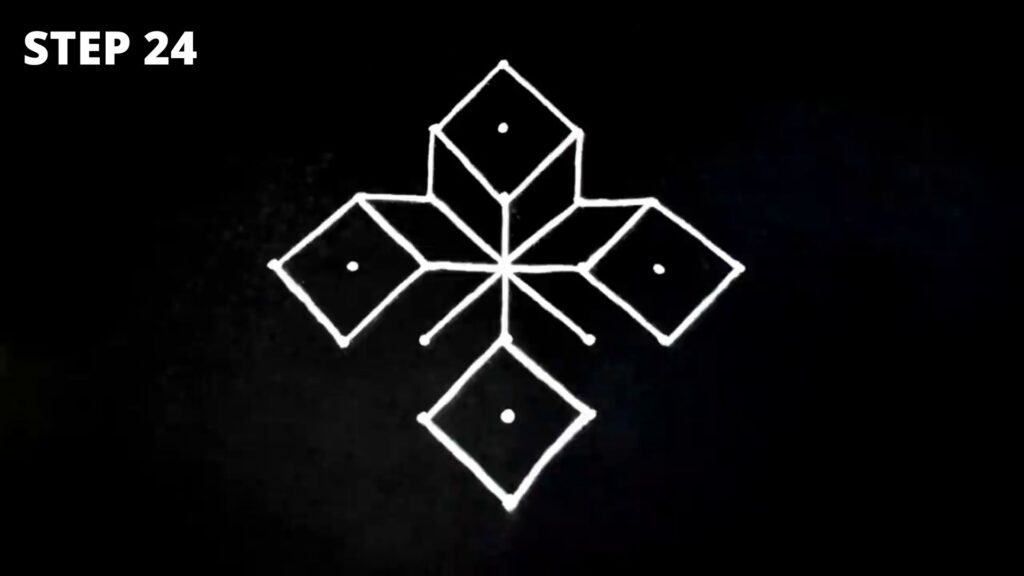
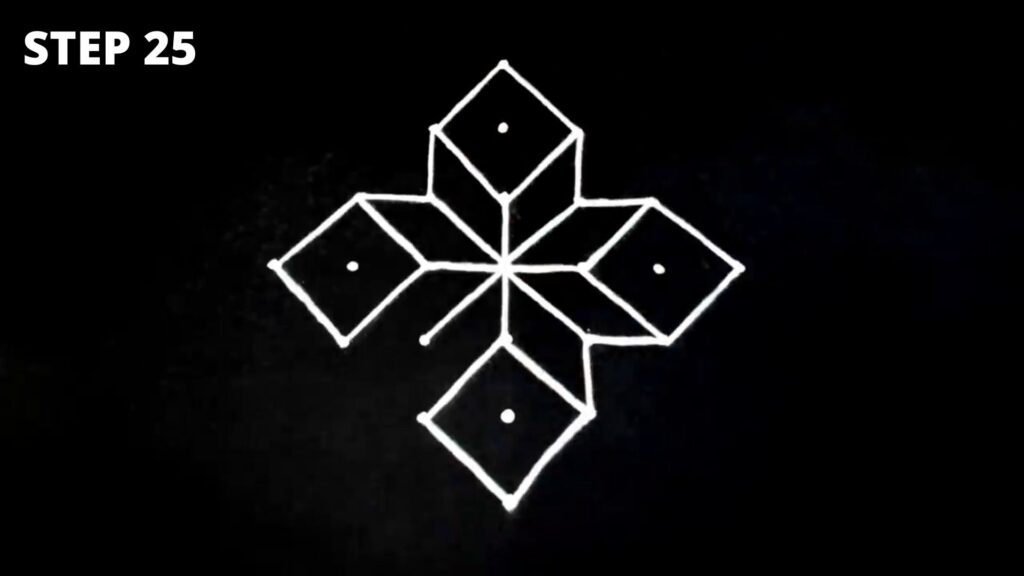
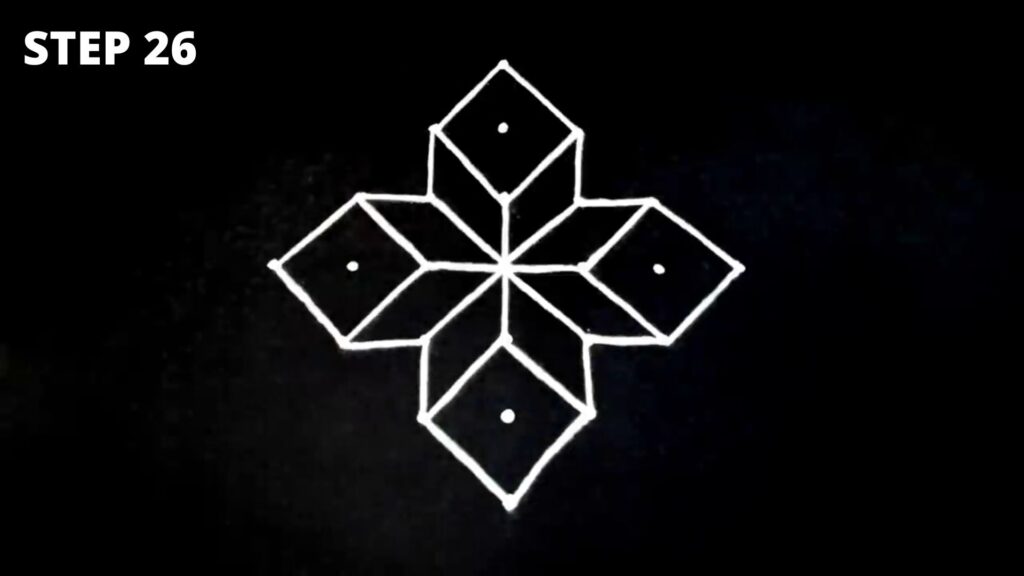
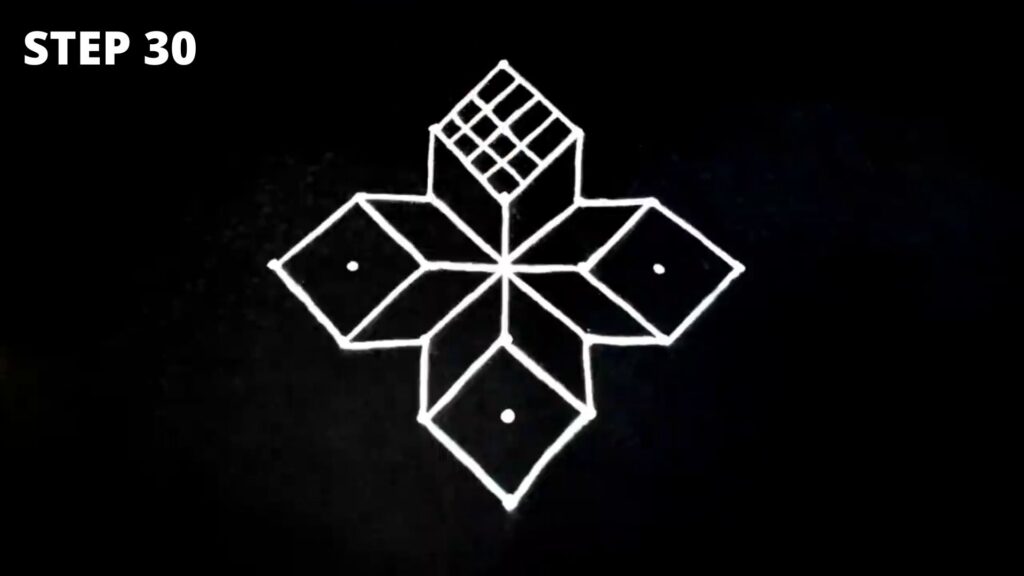
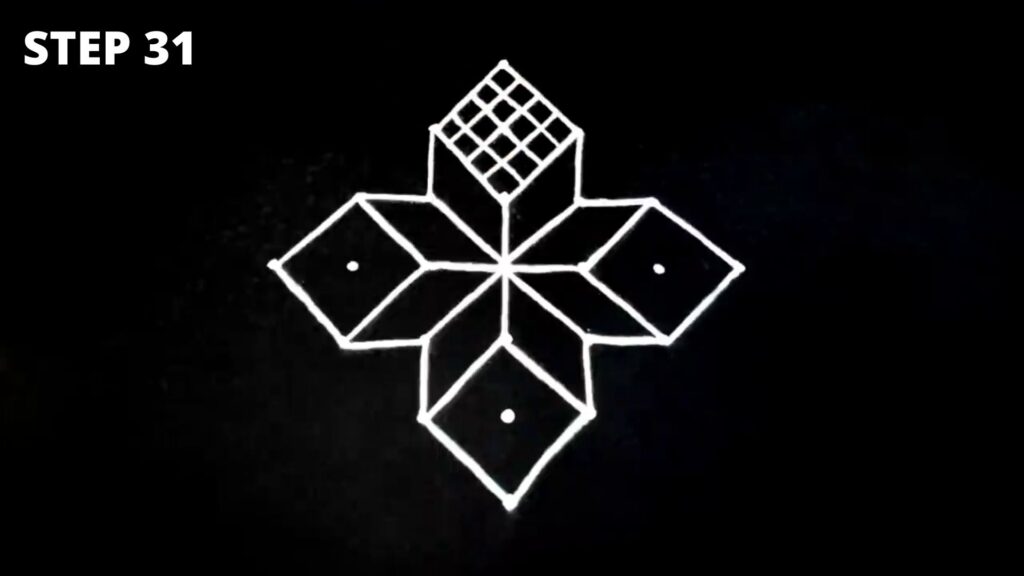
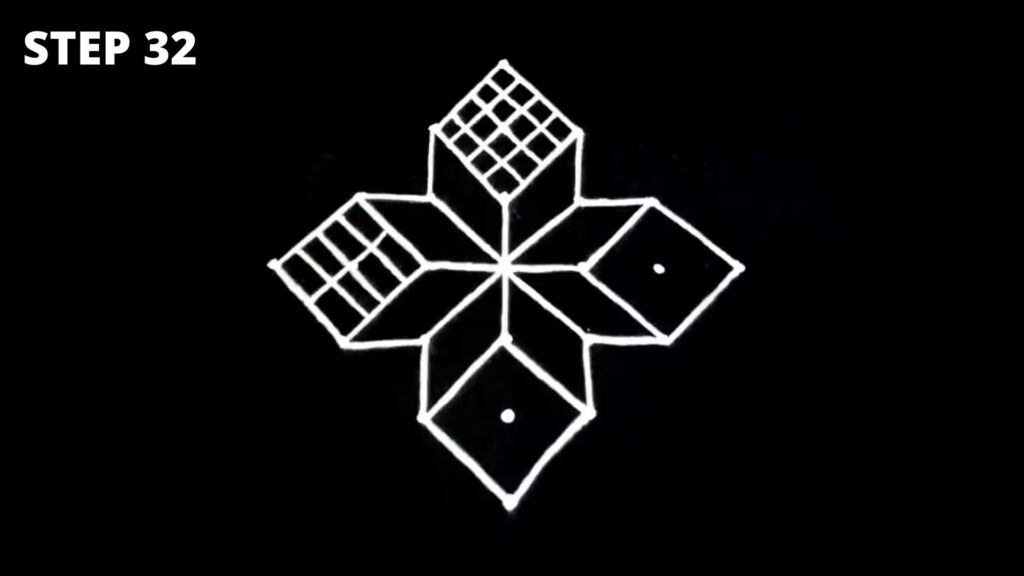
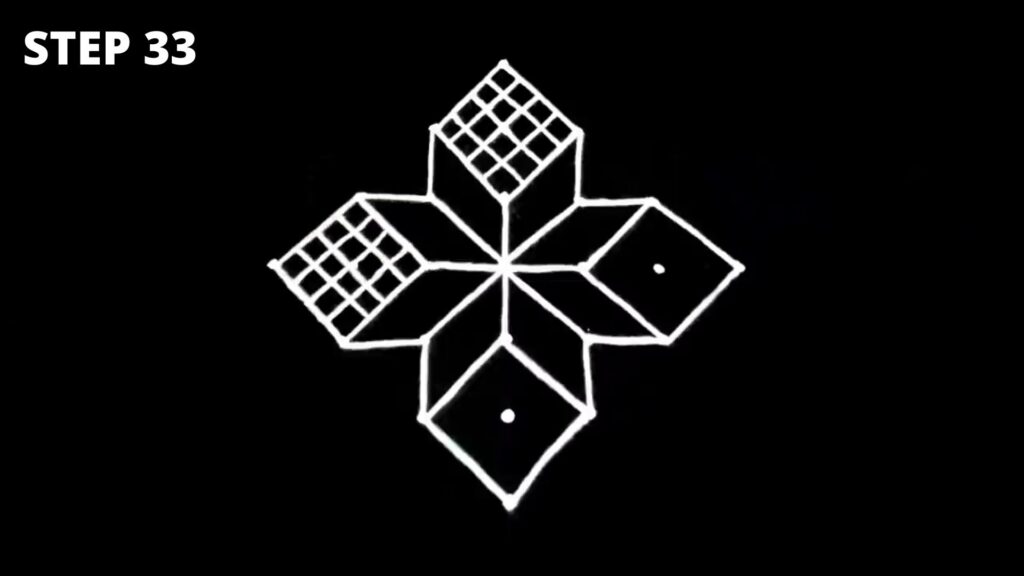
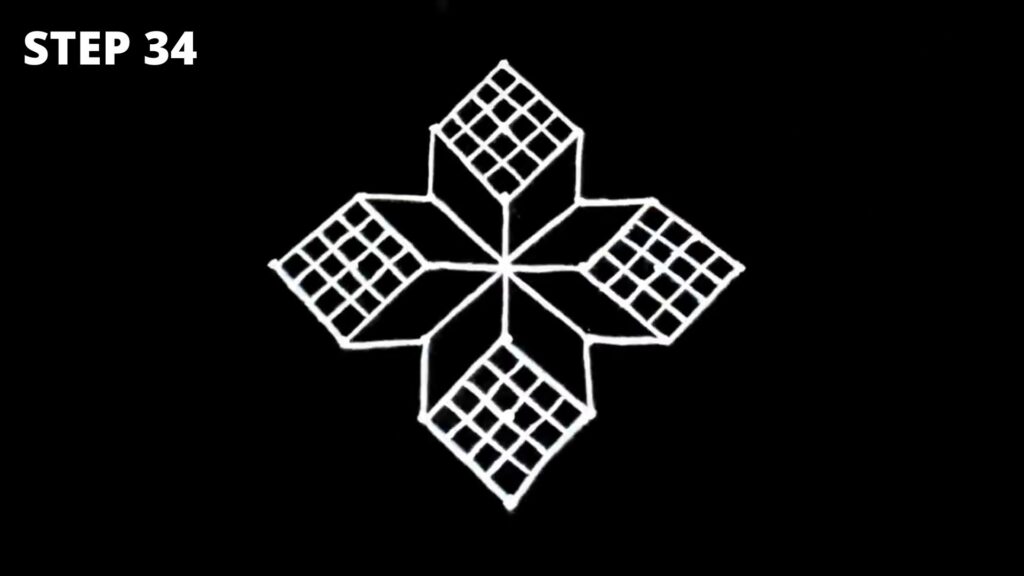
Steps 8 to 34: Starting with Rangoli
Now that our 7×1 rangoli dot grid is ready, we will start joining these dots as shown in images for Steps 8 to 34. As you can see, it is not as complex as we think. Even if you do not have a very high skill level, all you need to do is follow the steps mentioned in this article.
Don’t forget to read our earlier article, “8 Steps to Making Simple Rangoli Design 2021.”



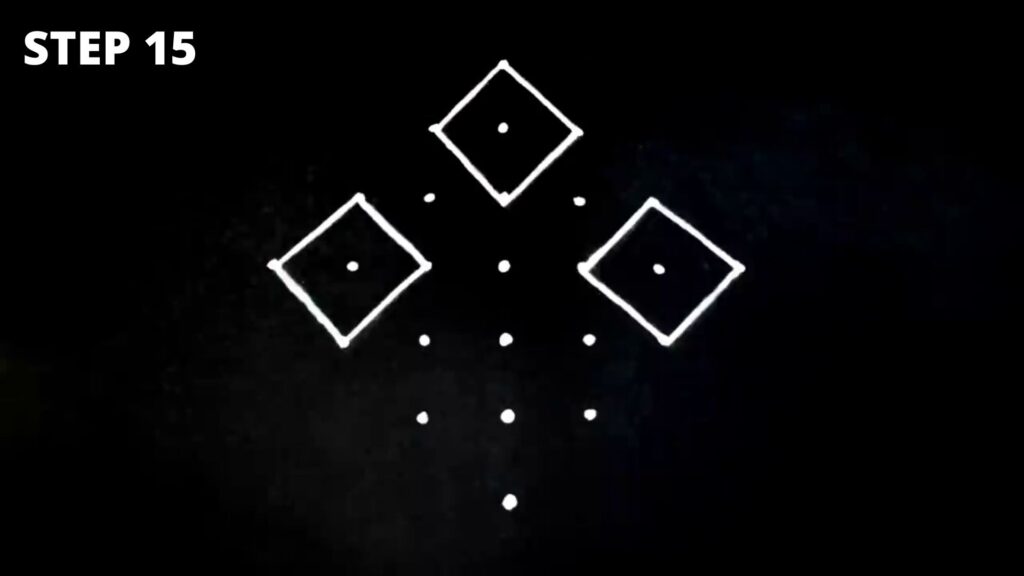
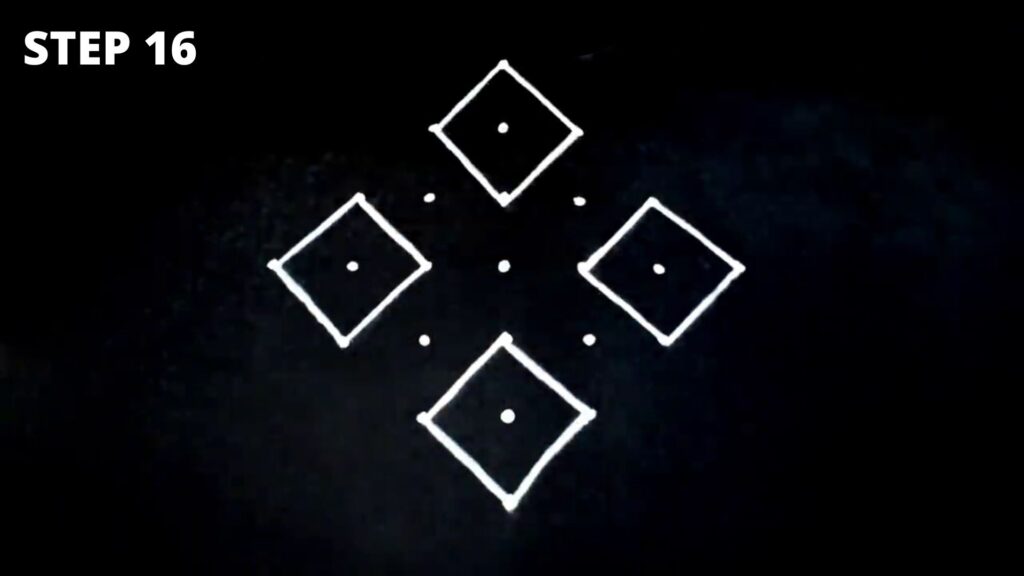
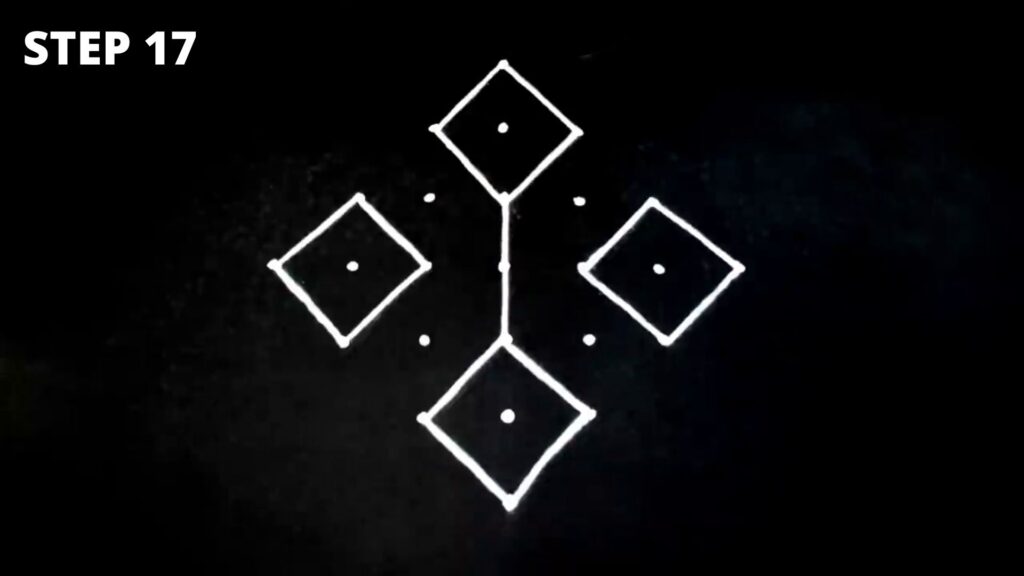
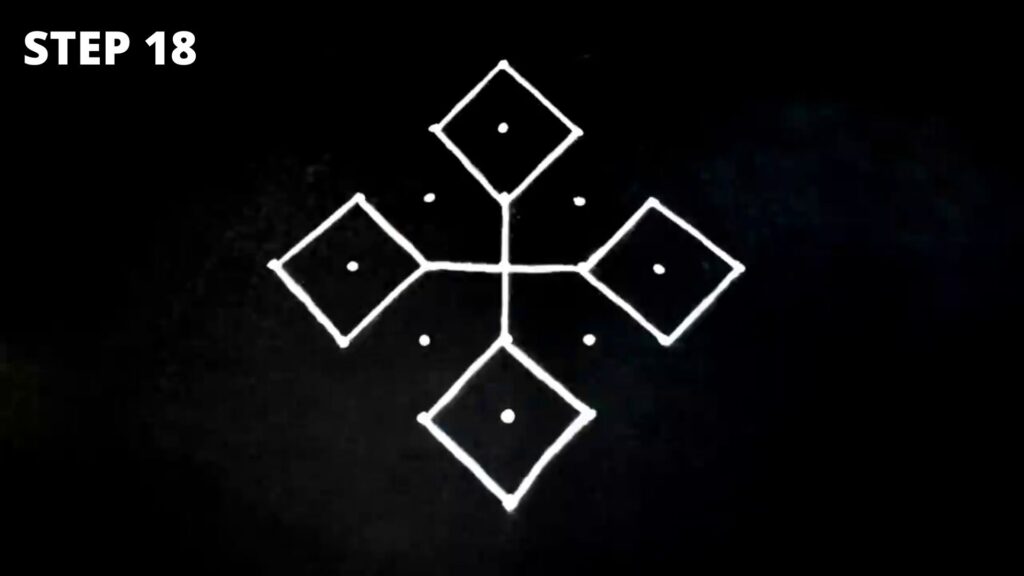



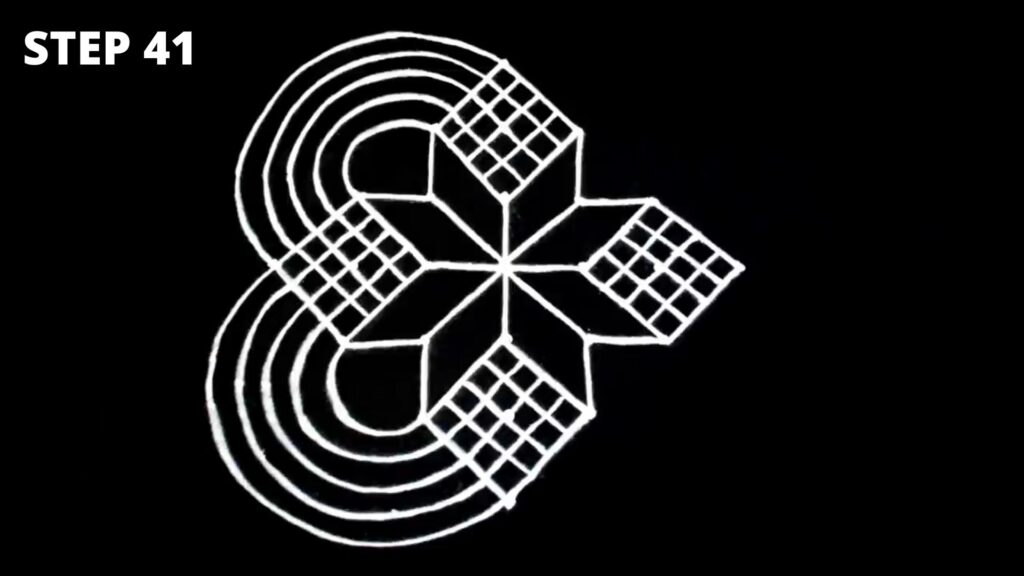
Steps 35 to 41
At Step #34, you are at the halfway mark of making this easy rangoli design with dots. Follow steps 35 to 41 and see how we draw those beautiful curves and connect the adjoining squares. This we do to all four sides of the squared grid.

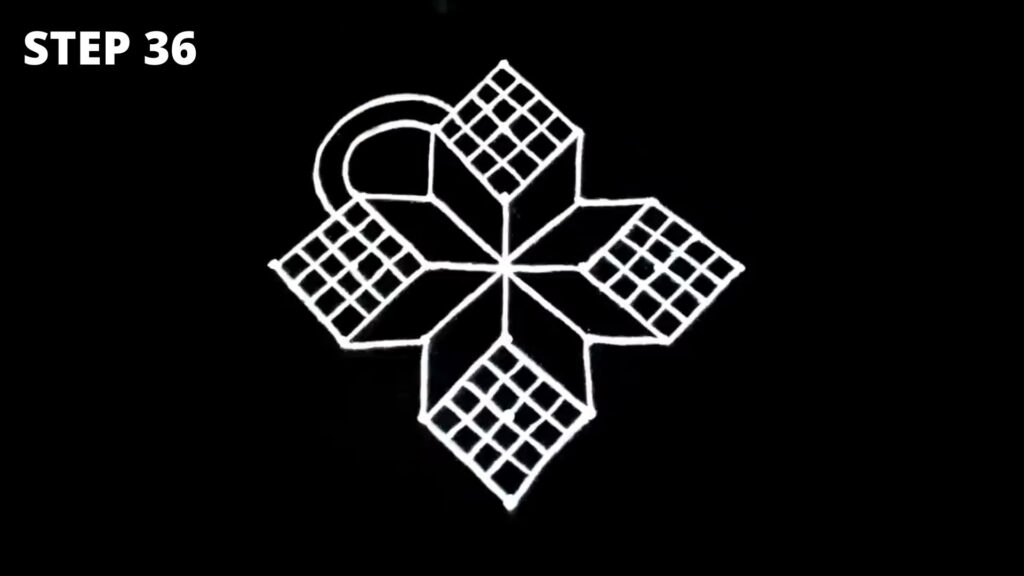
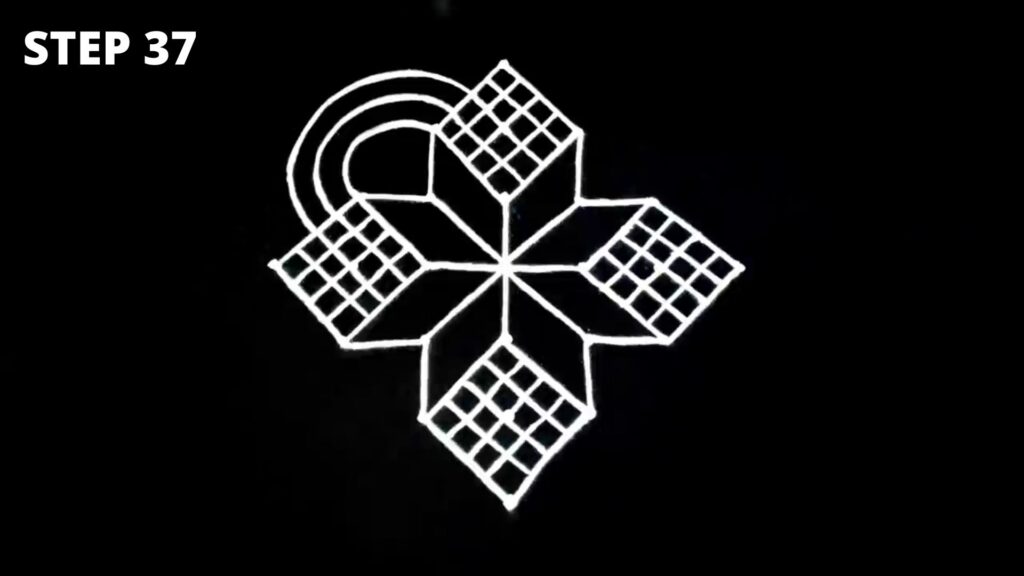
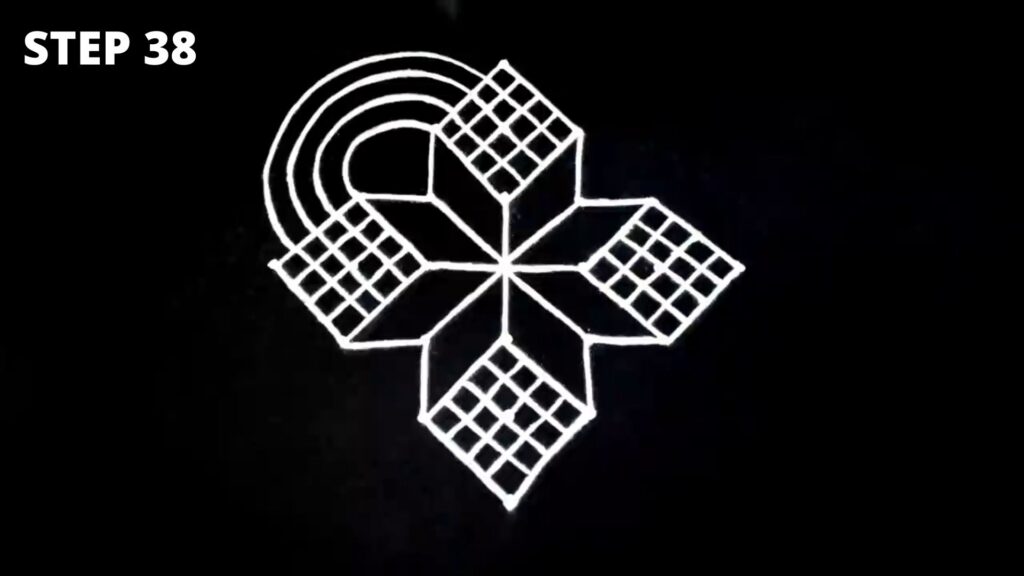

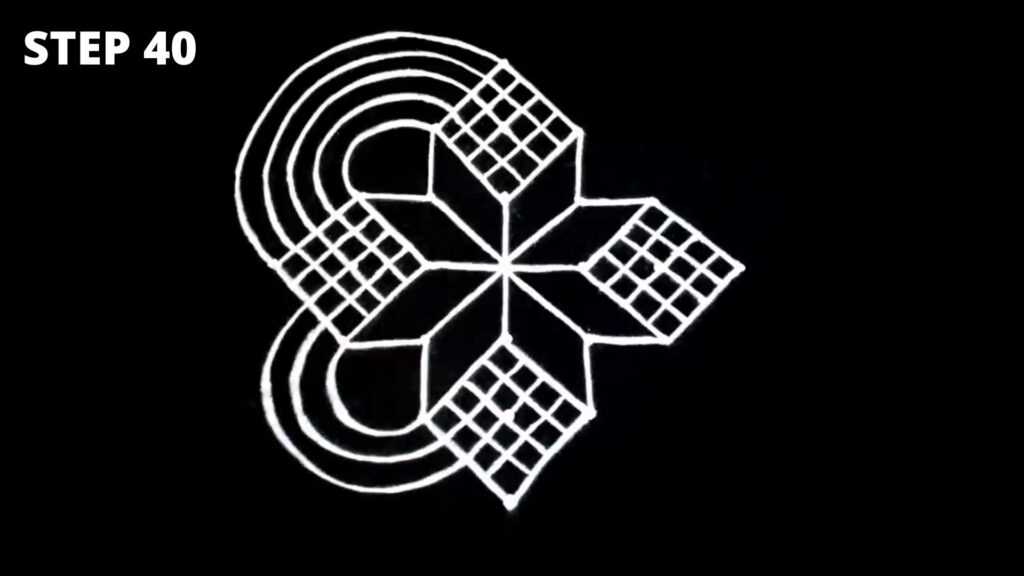
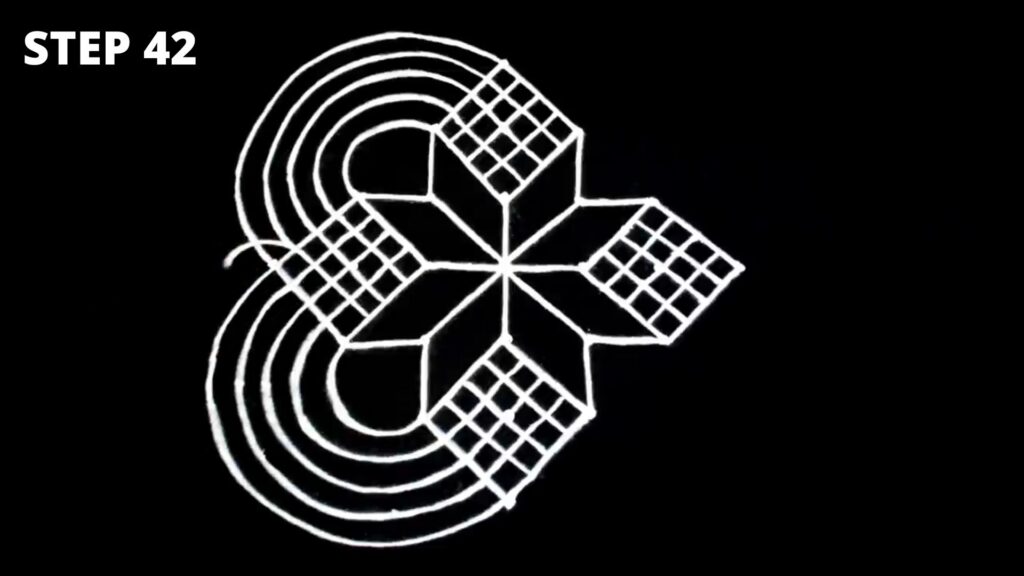
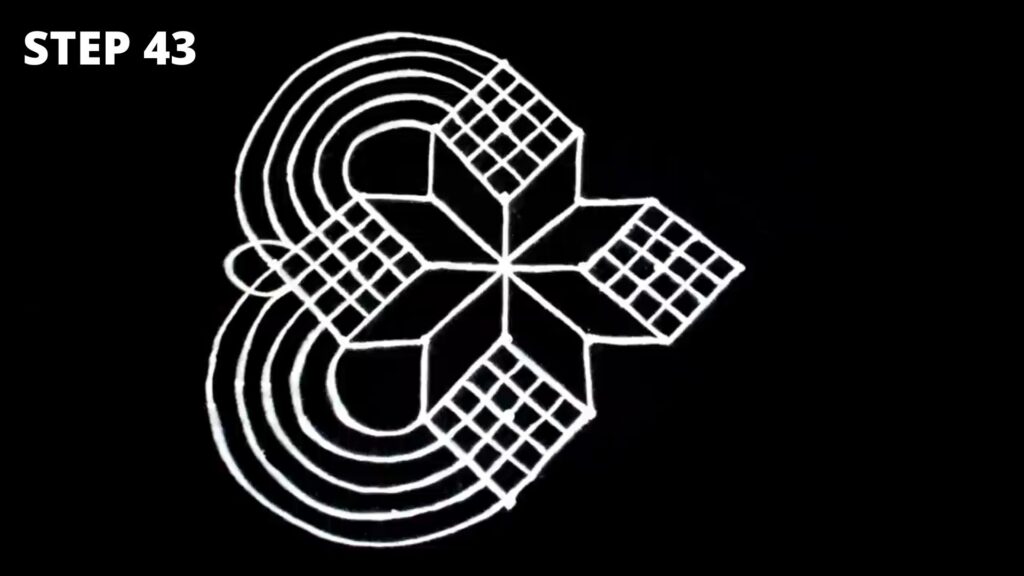
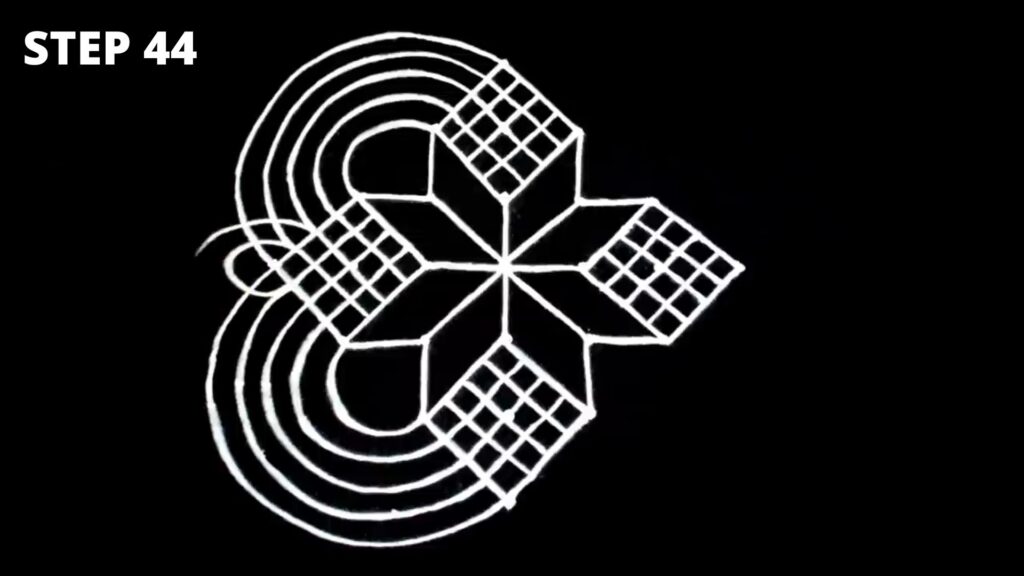
Steps 42 to 52
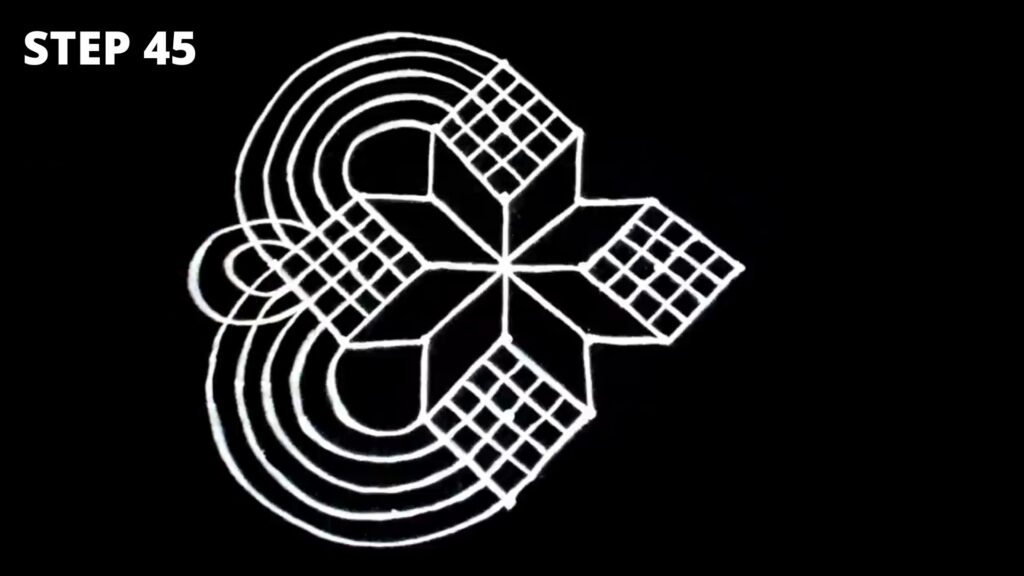
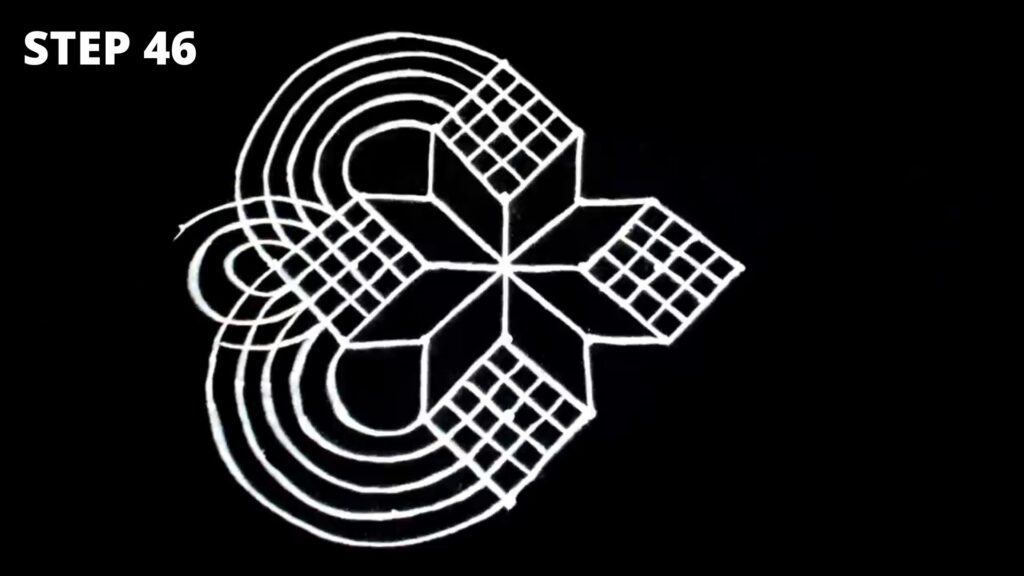
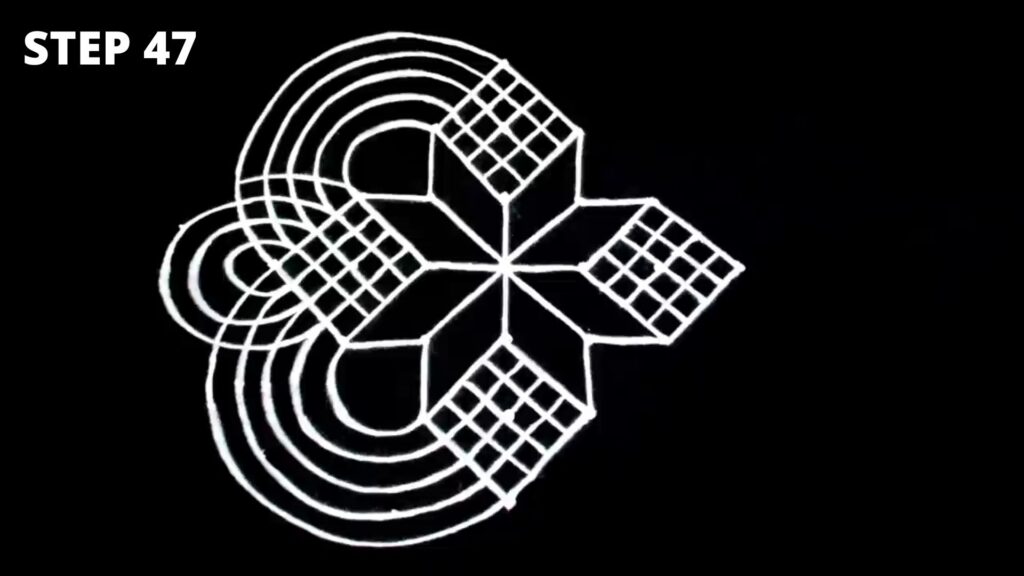
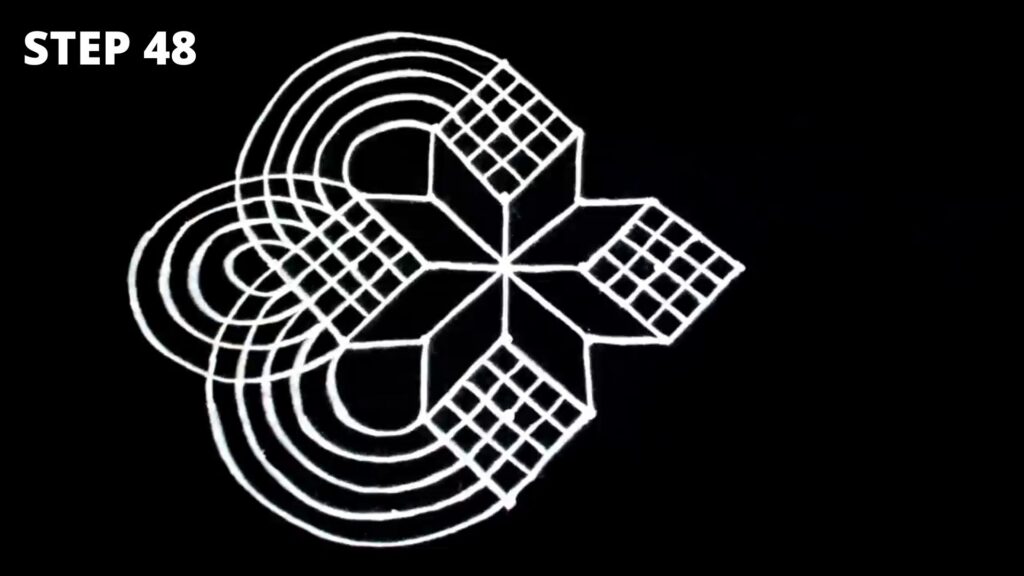
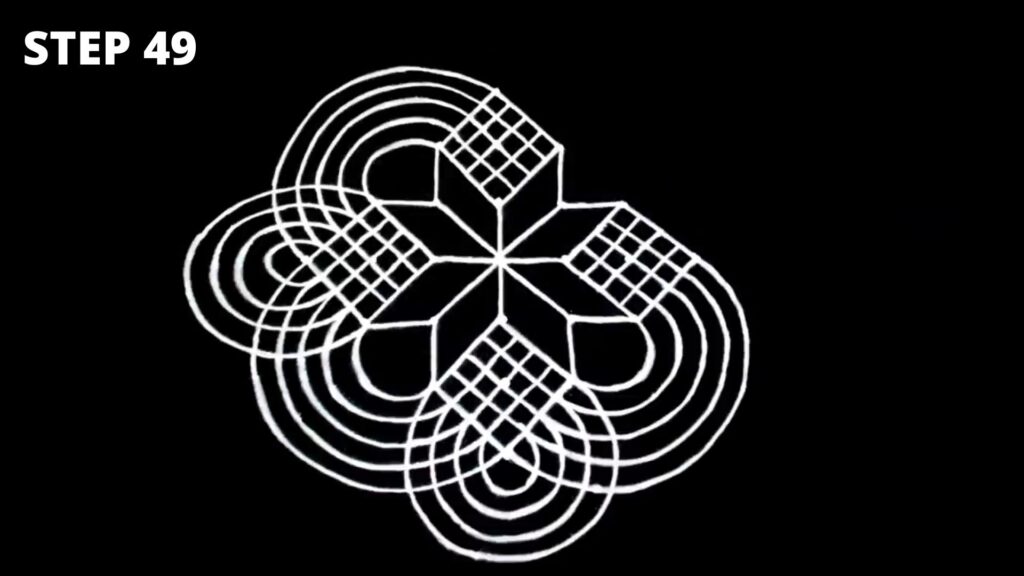
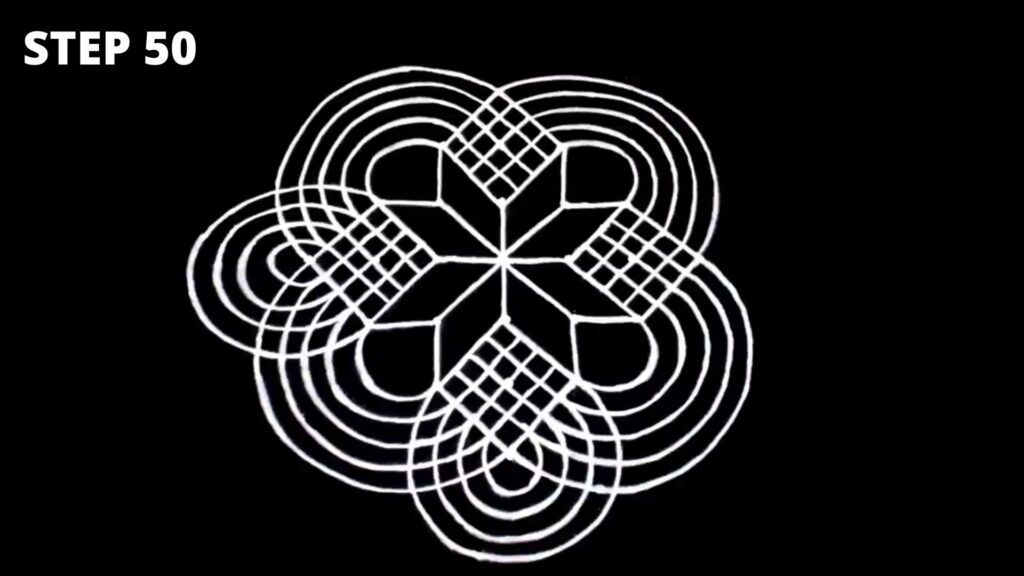
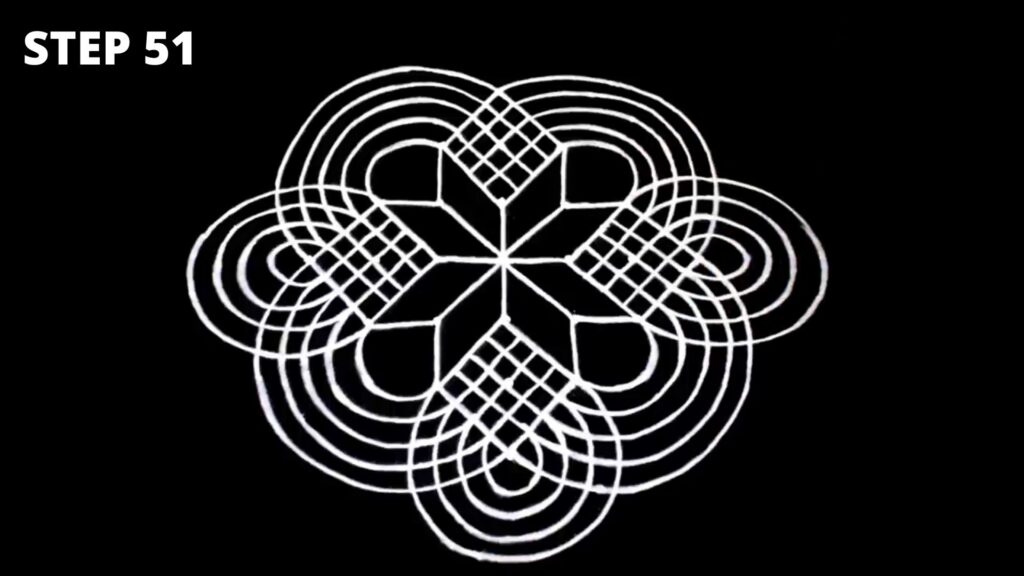
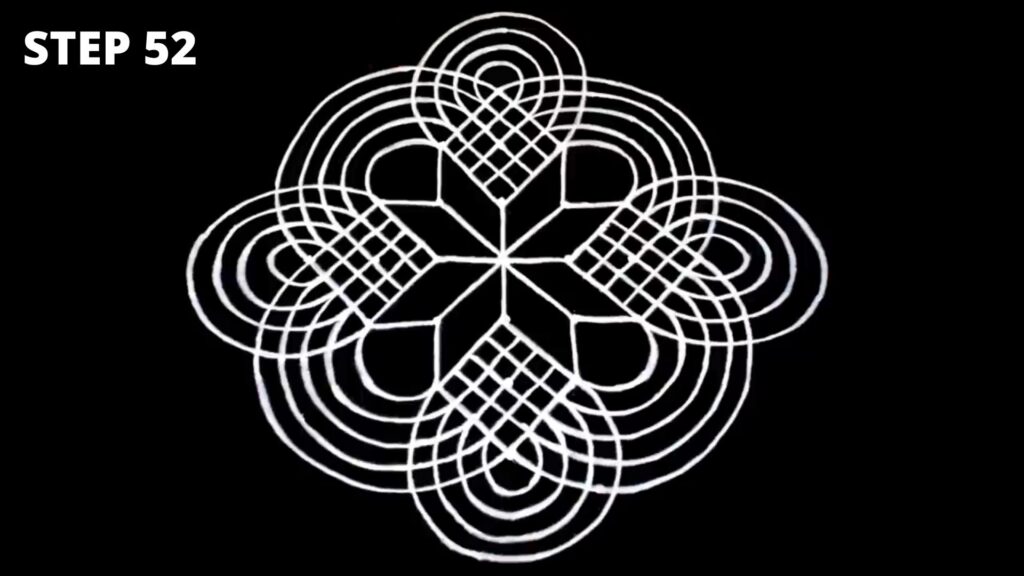
Now that we have completed the creation of outer curves and connected the squares, in steps 42 to 52, we will draw a few more curves, but this time, connect the smaller squares within a square. Don’t worry if you are finding the reading complicated. Follow the steps as shown in the images below of this easy rangoli design.
Steps 53 to 63
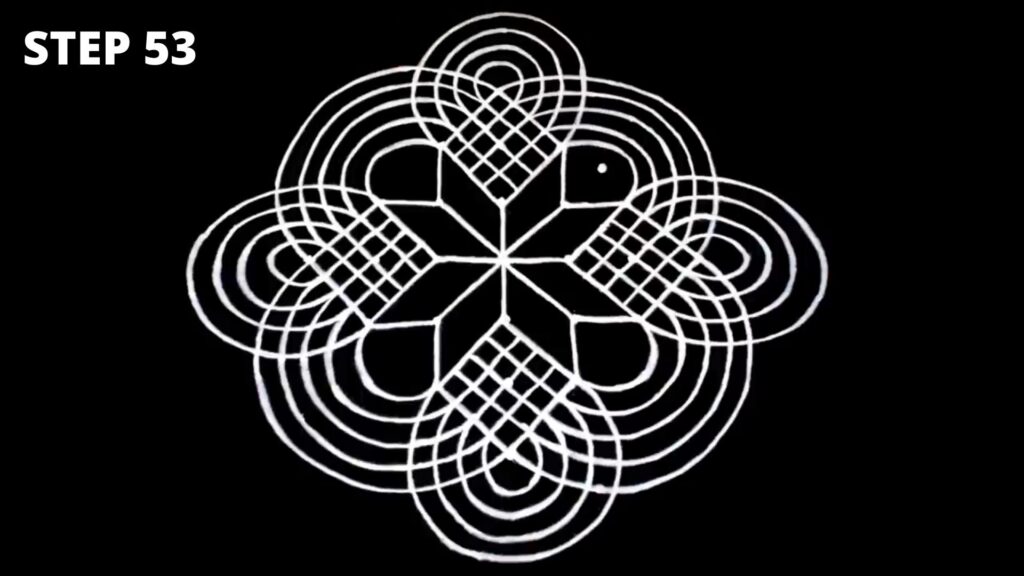
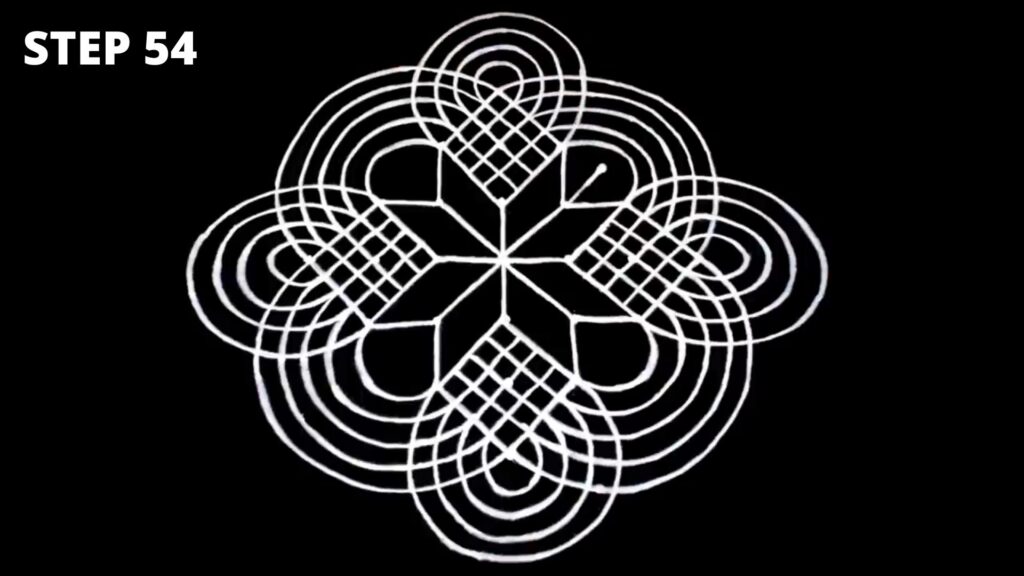
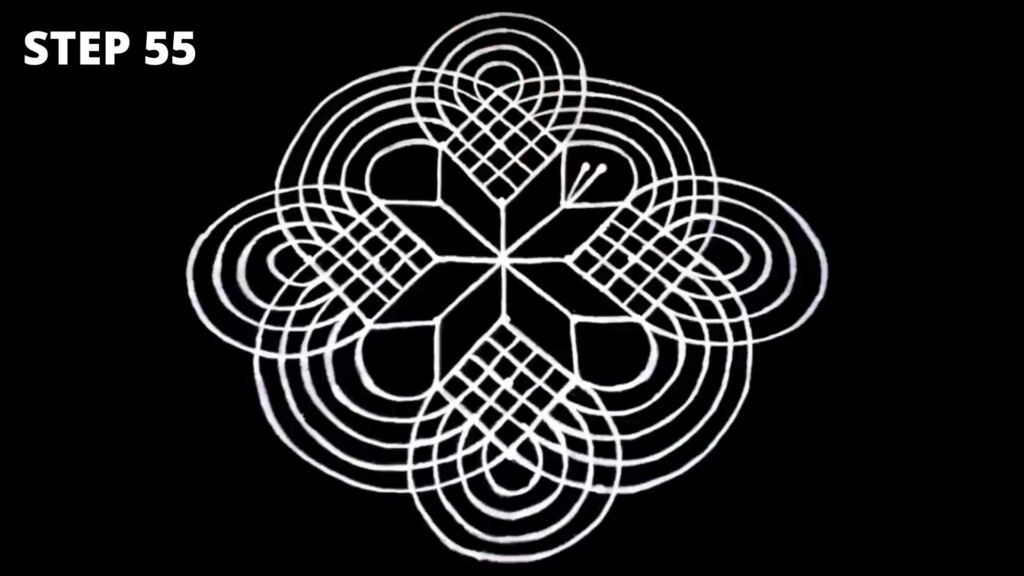
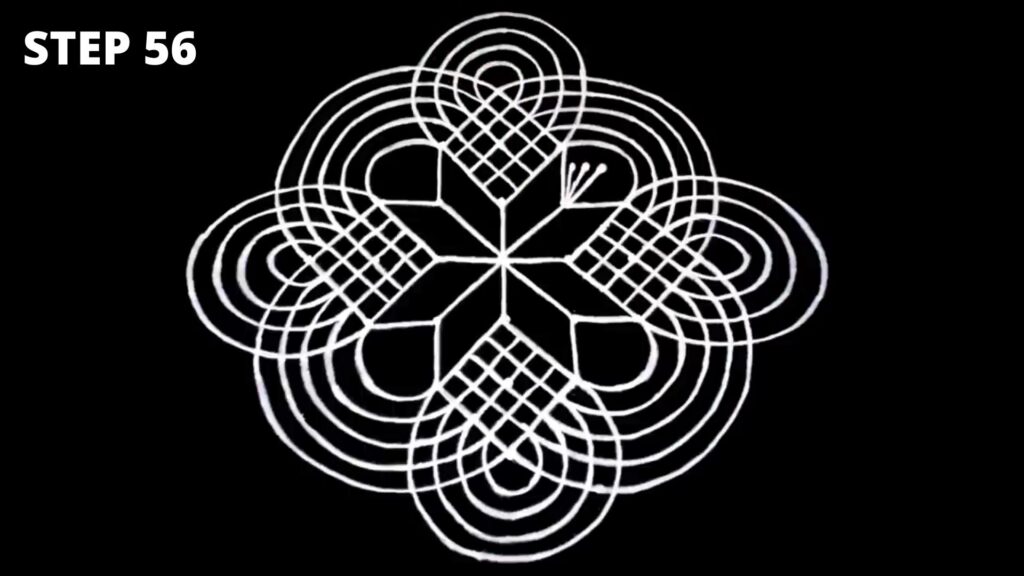
You have done a great job connecting all those dots and coming up with a beautiful rangoli design pattern as in step 52. Now one final touch is required in the way of finalizing your rangoli. We will decorate the inner spaces of the rangoli design with lines, as shown in the images below (steps 53 to 63).
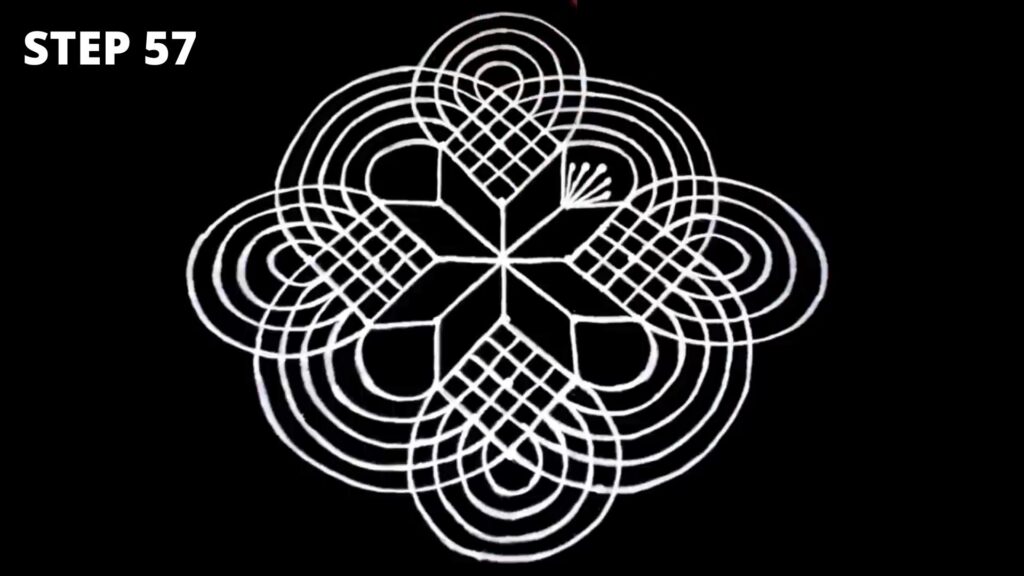
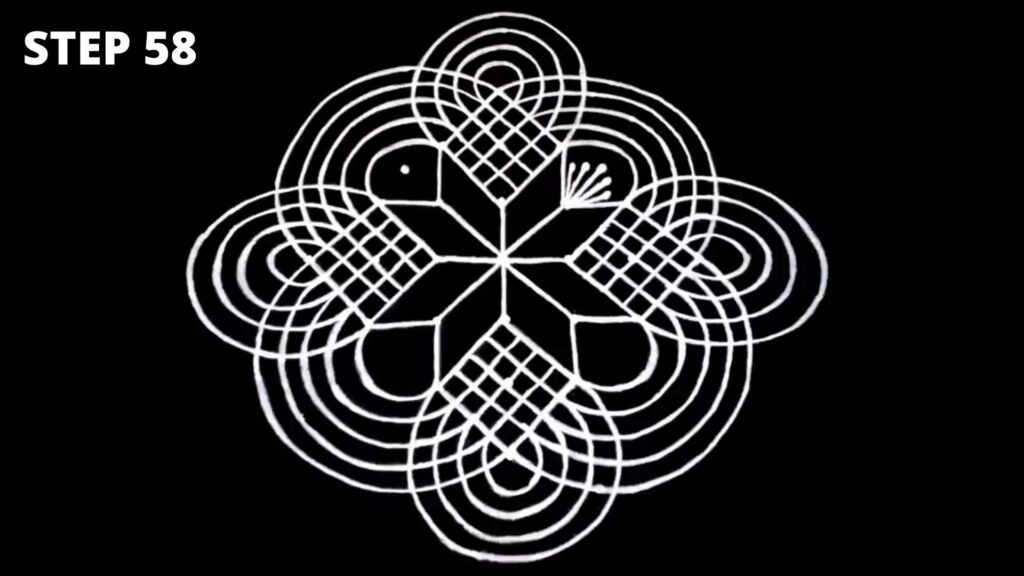
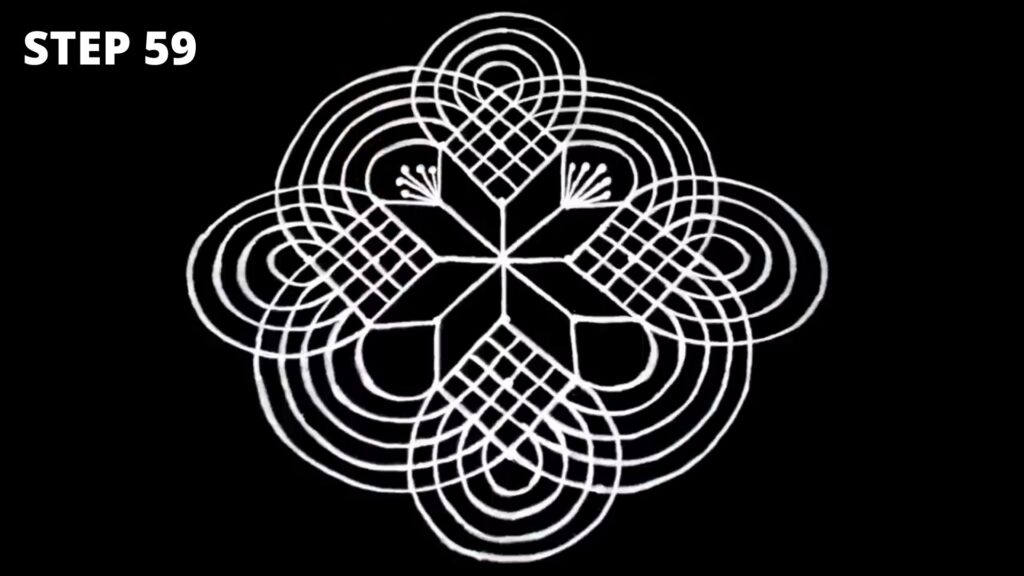
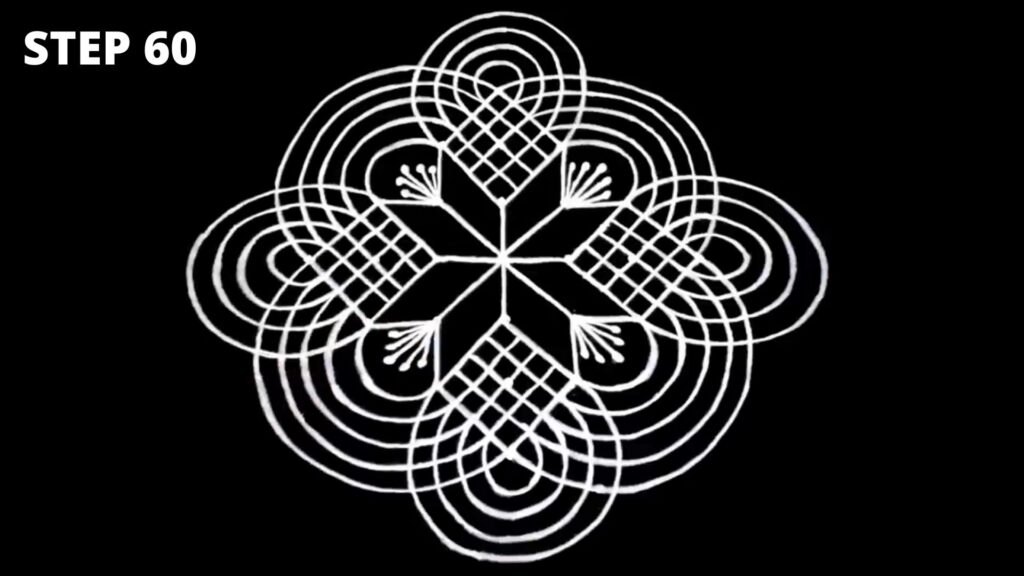

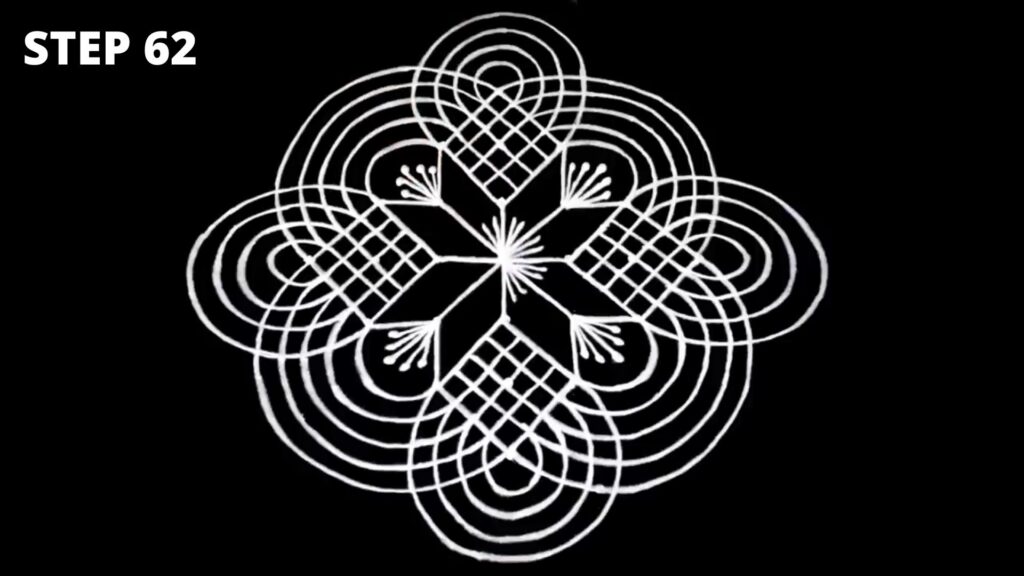
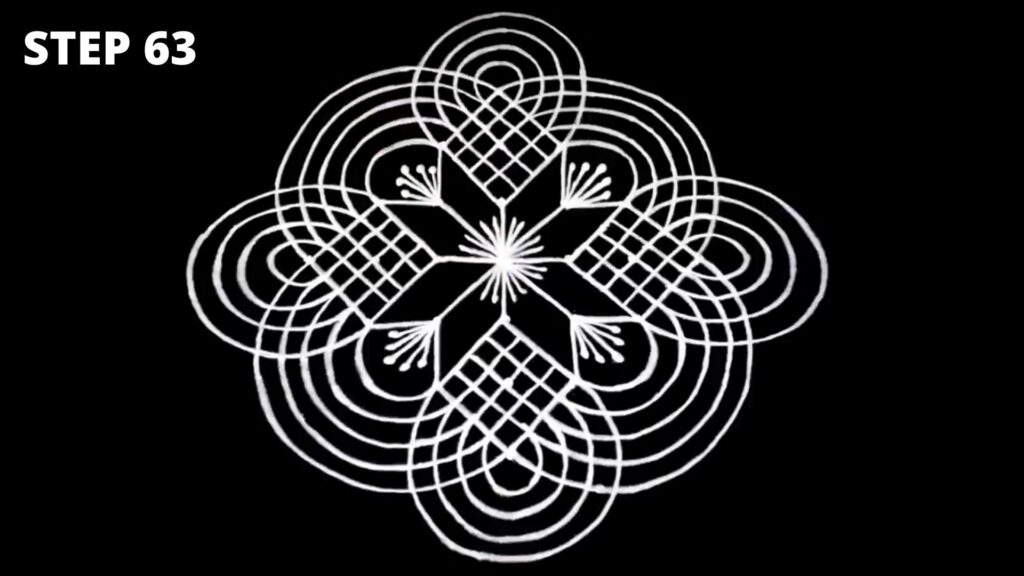
Congratulations! You have successfully designed this beautiful rangoli design with 7×4 dots. Check the final design in the image below.
10 Fun Things To Do In Birmingham Alabama
Final Image
Do not forget to leave a comment and share it with friends if you liked the presentation.
Happy Rangoli!

